
Desserts
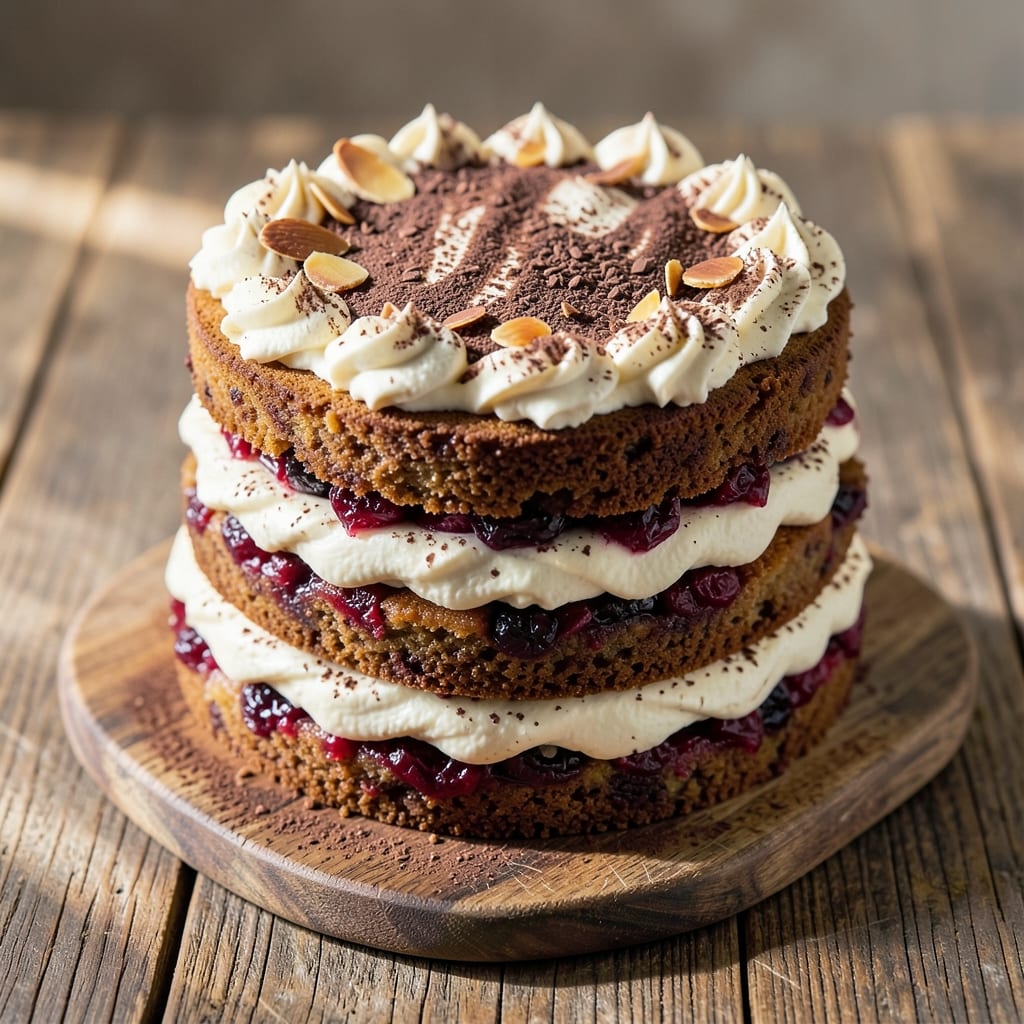
This alcohol-free Christmas cake delivers all the traditional spiced fruit flavors without a drop of brandy or rum. 🌟 The secret lies in a rich fruit soak made with citrus zest, warm spices, and a touch of vanilla that mimics the depth alcohol would normally provide. What makes this recipe special is how it captures the essence of classic Christmas cake—moist, fragrant, and packed with dried fruits—while keeping it completely booze-free.
The process begins with a spiced fruit soak that infuses the cake with layers of flavor, then a steamed center ensures perfect moisture throughout. This method transforms simple ingredients like flour, butter, and eggs into a showstopping dessert that stays tender for weeks. The result is a cake with a golden, crackly crust and a rich, spiced interior that’s perfect for slicing and serving during the holidays.
What sets this recipe apart is its ability to age beautifully—the flavors actually improve over time, making it ideal for baking ahead. Whether you're hosting a festive gathering or simply treating yourself to a taste of Christmas, this cake delivers restaurant-quality results with a fraction of the effort. The warm spices and dried fruits create an aroma that fills your home, while the texture remains perfectly moist.
Ready in just 30 minutes of prep, this cake requires minimal active time but yields maximum impact. The foolproof technique ensures success every time, and the versatile serving suggestions—from slicing thin for tea to serving with whipped cream—make it perfect for any occasion. Let’s get baking!
Ingredients for alcohol free christmas cake
Twelve simple ingredients transform into a fragrant, booze-free Christmas masterpiece—moist, spiced, and packed with citrus brightness.
| Ingredient | Amount | Notes |
|---|---|---|
| All-Purpose Flour 🌾 | 3 cups | Sifted for even texture |
| Unsalted Butter 🧈 | 1 ½ cups | Cold, cubed for easier mixing |
| Granulated Sugar 🍚 | 2 cups | White or light brown |
| Large Eggs 🥚 | 4 whole | Room temperature for blending |
| Pure Vanilla Extract 🌿 | 2 tbsp | High-quality, Madagascar preferred |
| Ground Cinnamon 🌶️ | 1 tbsp | Freshly ground for warmth |
| Ground Nutmeg 🌶️ | ½ tsp | Freshly grated nutmeg preferred |
| Ground Allspice 🌶️ | ½ tsp | For deep spice complexity |
| Ground Cloves 🌶️ | ¼ tsp | Lightly toasted for aroma |
| Dried Mixed Fruit 🍇 | 3 cups | Chopped, unsweetened |
| Orange Zest 🍊 | 1 tbsp | Freshly grated from organic |
| Lemon Zest 🍋 | 1 tbsp | Freshly grated for brightness |
| Orange Juice 🍊 | ½ cup | Freshly squeezed, no pulp |
| Lemon Juice 🍋 | ¼ cup | Freshly squeezed, no pulp |
| Heavy Cream 🥛 | ½ cup | Cold for whipping |
| Powdered Sugar 🍚 | 1 cup | For dusting |
The dried fruit is the heart of this cake, so choose high-quality, unsweetened—Whole Foods or Trader Joe's carry excellent options. Chop it yourself if possible, as pre-chopped pieces can be uneven. For zest, organic citrus delivers the most vibrant flavor. I always double-check the spices too—Penzeys Spices or bulk bins at natural markets ensure freshness. The citrus zest and juices are non-negotiable; they're what mimics the depth alcohol would normally provide. Store-bought juice works in a pinch, but fresh is absolutely essential for that restaurant-quality aroma.
No vanilla extract? Vanilla bean paste works beautifully, though you'll need to adjust the amount slightly. Running short on mixed fruit? Combine raisins, dried cranberries, and chopped apricots for a similar effect. The spices can be swapped too—cinnamon is non-negotiable, but you could reduce allspice slightly if you prefer a milder profile. For the citrus, bottled juice with no added sugar is better than skipping it entirely. And if you're worried about the cake being too moist, don't be—the steaming process ensures perfect texture without any sogginess. The butter should be cold when you mix it, but don't let it get rock-hard or it'll be tough to incorporate.
This cake improves with age—wrap tightly in plastic wrap and store at room temperature for up to 3 weeks. For longer storage, freeze it unwrapped for 3 months—the flavors actually deepen over time. I like to portion it into individual slices for gifting, wrapped in parchment and tied with festive ribbon. The powdered sugar dusting should be done just before serving to keep it fresh. If you're making this ahead for a party, the spiced fruit soak can be prepped 2 days in advance—it keeps beautifully in the fridge.
Why You'll Love This Recipe
- Pantry staples only: flour, sugar, butter, eggs. No specialty ingredients, no pricey shortcuts. Makes two cakes (or one big one), so leftovers last through the season without breaking the bank.
- No-Fuss Layers: This cake comes together like a dream—just mix, bake, and layer. No tricky folding or last-minute substitutions; the buttercream and vanilla sponge handle all the work.
- Vanilla Buttercream Bliss: That rich vanilla extract and creamy butter blend into something dangerously addictive. It’s sweet but not cloying, with a texture that melts in your mouth—no alcohol needed to make it special.
- Holiday Crowd-Pleaser: Serve it at Christmas, New Year’s, or even a random Tuesday. Slice it thick for guests, pack it for potlucks, or stash slices in lunchboxes—it’s the kind of cake that disappears fast.
Step-by-step instructions for alcohol-free Christmas cake
This rich, spiced fruit cake delivers all the holiday magic—without a drop of alcohol!
👨🍳 Step 1: Soak the Dried Fruit in Citrus and Spices
In a large mixing bowl, combine the 3 cups dried mixed fruit with the 0.5 cup orange juice, 0.25 cup lemon juice, 1 tbsp orange zest, and 1 tbsp lemon zest. This citrus-soaked fruit will infuse the cake with bright, festive flavor. Add the 1 tbsp ground cinnamon, 0.5 tsp ground nutmeg, 0.5 tsp ground allspice, and 0.25 tsp ground cloves, then toss everything gently to coat the fruit evenly.
Cover the bowl with plastic wrap and let the fruit soak at room temperature for at least 4 hours (or overnight in the fridge). This step is crucial—it ensures the fruit absorbs the citrus and spice flavors, creating that signature Christmas cake taste. I always use freshly toasted spices for an extra aromatic boost, but if you're short on time, pre-ground spices will work just fine. Just make sure the fruit is thoroughly coated before moving on.
🍳 Step 2: Cream Butter and Sugar for Light Texture
In a stand mixer fitted with the paddle attachment, beat the 1.5 cups cold, cubed unsalted butter with the 2 cups granulated sugar on medium speed for 3-4 minutes. You're aiming for a light, fluffy mixture that's pale and airy—this is what gives your cake that perfect crumb. Scrape down the sides of the bowl with a rubber spatula to ensure even mixing.
Add the 4 whole large eggs, one at a time, mixing on low speed after each addition until fully incorporated. This slow incorporation prevents the eggs from scrambling. Stir in the 2 tbsp pure vanilla extract and mix for another 30 seconds until fully combined. The mixture should be smooth and slightly thickened—this is the foundation of your cake's rich, moist texture. If you're using room-temperature eggs, they'll blend in more easily, but don't worry if they're slightly chilled.
🥘 Step 3: Combine Dry Ingredients and Fruit
In a separate bowl, whisk together the 3 cups sifted all-purpose flour. Sifting is key here—it aerates the flour and prevents a dense cake. Gradually add the dry flour to the butter mixture, mixing on low speed until just combined. Be careful not to overmix; you want to see a few streaks of flour remaining. This ensures a tender crumb rather than a tough one.
Remove the bowl from the mixer and gently fold in the soaked fruit using a silicone spatula. The fruit should be evenly distributed throughout the batter. Here's the thing—don't worry if the batter looks thick or slightly lumpy. The fruit adds moisture and texture, and the cake will come together beautifully. The batter should be soft but manageable, not sticky or runny.
🔥 Step 4: Bake in Layers for Even Cooking
Preheat your oven to 350°F. Grease two 9-inch round cake pans and line the bottoms with parchment paper. Divide the batter evenly between the two pans and spread it out smoothly. Bake for 25-30 minutes, or until a toothpick inserted into the center comes out clean. Rotate the pans halfway through baking for even cooking. The cakes should be golden on top and spring back slightly when pressed.
Once baked, remove the cakes from the oven and let them cool in the pans for 10 minutes. Then transfer them to a wire rack to cool completely. This cooling step is essential—it prevents the cakes from becoming soggy when you add the cream filling later. While the cakes cool, you can prepare the 0.5 cup heavy cream by whipping it lightly with 1 cup powdered sugar until it forms a smooth, spreadable consistency. This will be your cake's signature cream filling.
🍽️ Step 5: Assemble and Store for Maximum Flavor
Once the cakes are completely cool, level the tops if necessary and place one cake on a serving plate. Spread the whipped cream evenly over the top, then place the second cake on top. Dust the entire cake generously with an additional ½ cup powdered sugar for a classic finish. For extra flavor, you can brush the top with a simple syrup made from equal parts water and sugar, heated until dissolved.
Wrap the assembled cake tightly in plastic wrap and store it in the refrigerator for at least 24 hours before serving. This resting period allows the flavors to meld and the cake to develop its signature richness. When ready to serve, slice and enjoy the perfect balance of spiced fruit, moist cake, and creamy filling—all without a hint of alcohol!
Pro Tips For Making Alcohol Free Christmas Cake
- Cream Butter Slowly: DESCRIPTION: Whip the butter and sugar together until it’s pale and fluffy—about 3-5 minutes. I learned this the hard way: rushing it leaves the cake dense, and no one wants a brick for Christmas. Use room-temperature butter, and resist the urge to skip the extra minute of beating.
- Sift the Flour Twice: DESCRIPTION: Sift the flour before mixing and again when folding it into the batter. This prevents lumps and guarantees an even texture. Yes, it’s extra work, but your cake’s crumb will thank you—especially if you’re using a high-altitude oven.
- Don’t Overmix the Eggs: DESCRIPTION: Once the flour is incorporated, fold it in just until combined—no need to stir like you’re making pancakes. Overmixing develops gluten, and that’s how you end up with a tough, chewy cake instead of the tender one you’re after.
- Chill the Batter 30 Minutes: DESCRIPTION: Let the batter rest in the fridge before baking—even if you’re eager to pop it in the oven. This relaxes the gluten and helps the cake rise more evenly. I know, I know, but trust the process: your cake will be lighter for it.
Essential equipment for alcohol free christmas cake
Stand Mixer Essentials
Your KitchenAid stand mixer with the paddle attachment is non-negotiable for this recipe. The paddle creates that light, airy texture when creaming butter and sugar—something a hand mixer simply can’t match. I use my KitchenAid Artisan Series (5-quart bowl) because it handles the dense batter beautifully, but any 5-quart stand mixer will work. The key is mixing at medium speed for 3-4 minutes to incorporate air without overworking the butter. 💫
Baking Pans
Invest in two 9-inch round cake pans with removable bottoms—they’re a game-changer for even baking and easy release. I recommend Wilton Perfect Results pans because they distribute heat evenly and prevent sticking. Grease them thoroughly with butter or baking spray, then line the bottoms with parchment paper to ensure clean slices. For extra insurance, dust the pans with flour after greasing to prevent any potential sticking.
Measuring Tools
Precision matters in baking, so digital kitchen scales are my go-to for measuring flour and butter—OXO Good Grips is my favorite. For liquids, use a clear glass measuring cup with markings for 0.5 cup increments. The spoon-and-level method works for dry ingredients, but don’t pack the flour into the cup—just sweep it lightly with a knife for accuracy. A microplane for zesting citrus is also essential—it yields fine, aromatic zest without the bitter pith.
Mixing Bowls
Use a large stainless steel mixing bowl (at least 8-quart capacity) for soaking the fruit—it’s easy to clean and won’t retain odors. For the batter, a non-reactive glass or ceramic bowl (like Pyrex) works best to prevent any metallic flavors. I also keep a silicone spatula on hand for folding in the soaked fruit gently—it won’t scratch your bowls and ensures even distribution. A whisk is handy for combining the flour, too.
Cooling Rack
A wire cooling rack is a must-have for this cake—it prevents sogginess by allowing air to circulate underneath. I use a collapsible rack from OXO that fits snugly in my fridge for storage. Let the cakes cool completely before assembling to avoid a gummy texture. Pro tip: Place a damp towel under the rack if your kitchen gets chilly—it helps regulate temperature and speeds up cooling.
Storage Solutions
For long-term storage, airtight containers or plastic wrap are your best friends. I wrap the assembled cake tightly in plastic wrap and store it in the fridge for up to 3 weeks—the flavors deepen over time! For gifting, portion slices into parchment-lined boxes tied with ribbon. A vacuum sealer extends freshness to 3 months in the freezer, but even standard freezer bags work if you squeeze out excess air. Label everything with dates to keep track!
Nutrition facts
Frequently asked questions
Can I substitute the dried fruit mix with fresh fruit?
Fresh fruit won't work the same way—this recipe relies on the concentrated sweetness and texture of dried fruit. For a similar effect, you could use a mix of dried apricots, cranberries, and chopped dates, but avoid fresh fruits like apples or pears, as they'd release too much moisture and make the cake soggy. If you're set on fresh fruit, try a separate compote layer between the cake layers instead.
How do I make this cake without eggs?
For an egg-free version, replace the 4 eggs with a flax egg substitute: mix 4 tbsp ground flaxseed with 10 tbsp water and let sit for 5 minutes to thicken. This works best when combined with 1 tbsp vinegar or lemon juice per egg to help with rise. The texture will be slightly denser but still delicious. For even better results, consider using a commercial egg replacer like Bob's Red Mill.
Why does my cake turn out dry? Overbaking is the most common cause—check for doneness at 25 minutes and remove when a toothpick comes out clean. Another culprit is using too much flour or baking in a dry environment. To prevent this, wrap the cake tightly in plastic after baking and store it in an airtight container. The citrus soak helps maintain moisture, so
Can I make this cake in a different shape?
While the recipe calls for two 9-inch rounds, you could bake it as a single 9x13-inch sheet cake or even a loaf pan for easy slicing. For a sheet cake, reduce baking time to 20-25 minutes and cover loosely with foil if the edges brown too quickly. The same batter works perfectly for bundt pans too—just adjust baking time based on your specific pan size.
How long can I keep this cake before serving?
This cake actually improves with time! Wrap it tightly in plastic and store at room temperature for up to 3 weeks. For longer storage, freeze the assembled cake (unwrapped) for 3 months. The flavors deepen as it ages, making it perfect for baking ahead. Just bring it to room temperature before serving to restore the perfect texture.