
Desserts
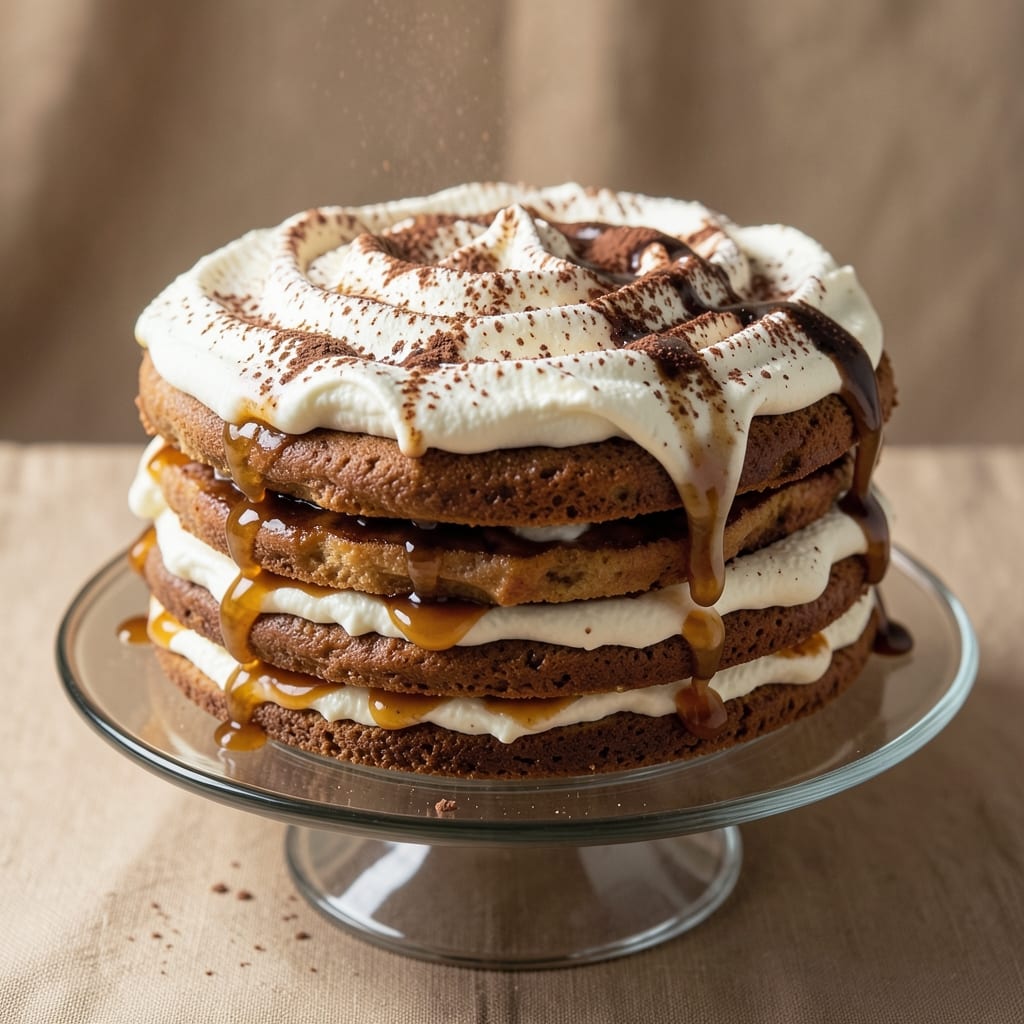
This alcohol-free tiramisu cake delivers all the classic flavors—coffee-soaked ladyfingers, velvety mascarpone cream, and rich cocoa—without a drop of liquor. The secret lies in a strong coffee syrup (no alcohol needed) that infuses the layers with depth, while vanilla and cocoa powder create that signature tiramisu taste. I designed this recipe after years of perfecting the balance between texture and flavor, ensuring every slice stays moist and decadent.
What sets this version apart is the foolproof layering technique that prevents soggy bottoms while keeping the cake light and airy. You’ll work with store-bought ladyfingers (for convenience) and a creamy mascarpone substitute made with heavy cream and powdered sugar—no special equipment required. The cake needs at least 4 hours to chill, but the wait is worth it for that restaurant-quality texture.
By the time you serve it, you’ll have a rich, coffee-infused dessert with perfectly balanced sweetness and bitterness—no booze required. The layers stay distinct, the cream remains silky, and the cocoa dusting adds that final touch of elegance. It’s ideal for holiday gatherings, dinner parties, or satisfying your tiramisu cravings without the alcohol.
This recipe is vegetarian-friendly and easily adaptable for dietary needs—just swap the ladyfingers for gluten-free versions if needed. The key to success? Patience with chilling and precise layering. Let’s create a tiramisu that impresses without compromising on flavor.
Ingredients for alcohol free tiramisu cake
Coffee-soaked layers, velvety cream, and rich cocoa—this dessert delivers classic tiramisu flavors without alcohol.
| Ingredient | Amount | Notes |
|---|---|---|
| Store-Bought Ladyfingers 🍰 | 24 whole | Savoiardi or sponge fingers, gluten-free if needed |
| Strong Brewed Coffee ☕ | 1 ½ cups | Cold or room temperature, no alcohol |
| Granulated Sugar 🍚 | ½ cup | For coffee syrup sweetness |
| Heavy Whipping Cream 🥛 | 1 ½ cups | Full-fat for best texture |
| Powdered Sugar 🍚 | 1 cup | For mascarpone substitute |
| Vanilla Extract 🌿 | 1 tsp | Pure vanilla for authentic flavor |
| Unsweetened Cocoa Powder 🍫 | ½ cup | Natural cocoa, not Dutch-processed |
| Instant Espresso Powder ☕ | 2 tbsp | Boosts coffee flavor without alcohol |
| Powdered Sugar 🍚 | ¼ cup | For final dusting |
| Cocoa Powder 🍫 | ¼ cup | For final dusting |
| Dark Chocolate Shavings 🍫 | ½ cup | Optional garnish, 70% cocoa |
| Coffee Liqueur Substitute ☕ | ½ cup | Made with coffee + vanilla syrup |
The ladyfingers are non-negotiable for texture—Buitoni or Dallmayr are my go-tos, but any store-bought sponge fingers work. For gluten-free, Schär makes excellent versions. The coffee matters too—dark roast, brewed strong, then sweetened with sugar and a splash of vanilla. If you're using instant espresso powder, Starbucks or Nescafé brands dissolve smoothly. The key to avoiding soggy layers? Chill the coffee mixture for 30 minutes before brushing—it lets the ladyfingers absorb just enough without turning mushy.
No heavy cream? Whipped coconut cream works, but the texture won’t be identical. The powdered sugar in the mascarpone substitute can be swapped for confectioners' sugar if you prefer finer texture. Short on cocoa powder? Dutch-processed cocoa is fine, but it’s less vibrant. For the coffee liqueur substitute, mix 1/4 cup coffee + 1/4 cup vanilla syrup + 1/4 cup water—it mimics the depth without the alcohol. The instant espresso powder is a game-changer (trust me, it’s not just for convenience)—it intensifies the coffee flavor without the bitterness of overbrewed coffee.
This cake needs at least 4 hours to develop its magic—plan ahead! Store leftovers in the fridge for up to 3 days, covered tightly. The layers hold up beautifully, but the cream may weep slightly after 2 days. For make-ahead prep, assemble the cake a day ahead and refrigerate. The cocoa dusting? Use a fine-mesh sieve to avoid clumps. And if you’re feeling fancy, melt dark chocolate and drizzle between layers—it adds a luxurious touch without complicating the process.
Why You'll Love This Recipe
- No-Fuss Layers: I swear by store-bought ladyfingers here—no baking, no mess, just stack and soak. The real magic is in brushing them with that strong coffee (I use a quick French press), which takes all of two minutes.
- Coffee Kiss Cream: That whipped cream isn’t just sweet—it’s just right. The sugar dissolves into the cream while you whip it, so every bite has this perfect balance of rich, velvety texture and a subtle coffee punch. Honestly, it’s the kind of dessert that makes you pause mid-bite.
- Weeknight Flex: Make half the cake on Sunday, store it covered, and pull it out for dinner guests or a lazy Friday night. It’s my go-to when I need something impressive but don’t want to slave over it. (Yes, even on a Tuesday night.)
- Budget Win: Heavy cream and ladyfingers stretch this recipe far—easily feeds six for under $10. The coffee? You’ve already got it brewing. Leftovers? They’re the best kind, because this cake actually tastes better the next day.
Step-by-step instructions for alcohol-free tiramisu cake
Here's how to build rich, coffee-soaked layers without a drop of alcohol.
Prepare the Coffee Syrup
In a small saucepan, combine the 1.5 cups strong brewed coffee, 0.5 cup granulated sugar, and 2 tablespoons instant espresso powder. Bring to a gentle simmer over medium heat and stir until the sugar dissolves completely. Let it cool to room temperature—this syrup will soak through the ladyfingers for that signature tiramisu flavor without the boozy kick.
Here's the thing—I like to strain the syrup through a fine-mesh sieve to remove any grit from the espresso powder. This ensures a silky texture that won't make your cake taste gritty. Let it cool completely before using, or the ladyfingers will absorb too much liquid and turn soggy.
Make the Mascarpone Substitute
In a chilled mixing bowl, beat the 1.5 cups heavy whipping cream with an electric mixer until soft peaks form. Gradually add the 1 cup powdered sugar and 1 teaspoon vanilla extract, mixing on high speed until the cream thickens into a light, airy texture resembling mascarpone cheese.
This is where patience pays off. I've found that using a chilled bowl and beaters helps the cream whip faster and hold its shape better. Don't overmix—once it reaches stiff peaks, stop immediately. The texture should be thick enough to hold its shape when spooned but still smooth enough to pipe between layers.
Assemble the Cake Layers
Dip each of the 24 whole store-bought ladyfingers briefly into the cooled coffee syrup—just enough to moisten without making them soggy. Arrange half of them in an even layer on the bottom of an 8x8-inch baking dish. Spread half of the mascarpone mixture evenly over the ladyfingers, then sprinkle with 2 tablespoons of unsweetened cocoa powder. Repeat with the remaining ladyfingers and mascarpone mixture.
Work quickly but carefully here. The ladyfingers should be moist but not dripping wet—if they're too saturated, your cake will turn out more like a mousse than a cake. I like to dip them one at a time and place them immediately in the dish to prevent drying. Press down gently to ensure good contact between layers.
Chill and Set
Cover the assembled cake with plastic wrap and refrigerate for at least 4 hours, or preferably overnight. This chilling time allows the flavors to meld together and the cake to set properly. The longer it chills, the more pronounced the coffee flavor becomes.
During this time, I recommend keeping the cake at a consistent temperature—don't move it from the fridge to the freezer or back. The cold, even environment helps the layers hold their shape. If you're short on time, you can speed up the process by placing the cake in the freezer for 2 hours, but the texture won't be quite as refined.
Dust and Garnish
Before serving, dust the top of the cake with a mixture of 0.25 cup powdered sugar and 0.25 cup cocoa powder for that classic tiramisu look. I use a fine-mesh sieve to create an even, snow-like coating. For extra flair, sprinkle the top with 0.5 cup dark chocolate shavings and drizzle with a thin layer of the coffee liqueur substitute if desired.
Slice the cake into 8 equal portions—each serving should have that perfect balance of coffee-soaked ladyfingers, creamy mascarpone substitute, and dusty cocoa finish. Serve immediately for the best texture, or store any leftovers in the fridge for up to 3 days, though I doubt it will last that long!
Pro Tips For Making Alcohol Free Tiramisu Cake
- CHILL THE COFFEE FAST: Dunk the ladyfingers in coffee that’s just off the boil but cooled to room temp—no waiting. I used to pour hot coffee straight over them and end up with soggy, mushy layers. A quick ice bath (5 minutes) for the brewed coffee keeps the structure intact while still soaking them properly.
- WEIGH THE CREAM COLD: Use heavy whipping cream straight from the fridge—no thawing it out on the counter. I learned this after a batch where the cream took forever to whip because it was lukewarm. Cold cream whips faster and holds its shape better, so skip the "let it sit" step unless you’re in a rush.
- DON’T SKIP THE REST: Let the assembled tiramisu sit uncovered in the fridge for at least 4 hours—overnight is ideal. I once rushed it and ended up with a cake that crumbled apart when I tried to slice it. The coffee needs time to fully absorb, and the layers need to set.
- SWEETEN THE COFFEE FIRST: Mix the granulated sugar directly into the hot coffee while it’s still brewing—this dissolves it completely and prevents a gritty texture. I used to add sugar after cooling, and it always left a weird, uneven sweetness. A quick stir with a spoon while hot does the trick.
Storing and reheating this alcohol free tiramisu cake
Refrigerator Storage
Store your alcohol-free tiramisu cake in an airtight container with parchment paper between layers to prevent sticking. Keep it refrigerated at 40°F or below for up to 3 days—the flavors actually deepen as it rests. I like using glass containers because they maintain moisture better than plastic. Just cover it tightly to prevent drying. 💡
Freezer Storage
For longer storage, wrap individual slices in plastic wrap and place them in a freezer bag with all the air pressed out. This method preserves texture for up to 1 month. When ready to serve, thaw slices in the fridge overnight—they’ll be just as delicious but slightly softer. Avoid microwaving; instead, let them sit at room temperature for 10-15 minutes before serving. ❄️
Reheating Leftovers
If your cake has been refrigerated, the cream layers may firm up slightly. To restore that silky texture, let slices sit at room temperature for 5-10 minutes before serving. For extra indulgence, warm the plate slightly in the microwave for 5-10 seconds—this melts the cream without drying it out. Never reheat in the oven, as it can make the ladyfingers tough. 🔥
Serving After Chilling
After the required 4-hour chill, your cake will be perfectly set. If you’ve stored it longer, let it sit at room temperature for 15-20 minutes before slicing—this helps the layers separate cleanly. I find that using a serrated knife and pressing gently through the center prevents crumbling. Serve immediately for the best texture, as the cream can weep slightly if left out too long. 🍽️
Make-Ahead Tips
Assemble the cake 24 hours ahead for the most flavorful result. The longer it chills, the more the coffee and cocoa flavors meld together. If you’re prepping for a party, store the assembled cake in the fridge until 1 hour before serving—this lets the layers firm up slightly for cleaner slices. Trust me, the anticipation makes it even more satisfying! ✨
Reviving Dry Layers
If your cake’s edges dry out slightly after storage, don’t worry! Brush a thin layer of coffee syrup (the same one used for soaking) over the top before serving. This adds moisture and enhances the coffee flavor. For extra richness, drizzle a little heavy cream over the top and let it soak in for 5 minutes before dusting with cocoa. 💛
Nutrition facts
Frequently asked questions
Can I make this tiramisu cake without coffee?
The coffee is essential for that signature tiramisu flavor, but you can substitute with strong black tea or chocolate syrup> for a different twist. For tea, use 2 cups brewed Earl Grey (cooled) and add 1 tsp vanilla extract to mimic the coffee depth. The instant espresso powder is key—it intensifies the flavor without needing alcohol.
Why does my cream layer look grainy?
Graininess usually means the powdered sugar wasn't fully dissolved or the cream was overmixed. Sift the powdered sugar first, and whip the cream just until soft peaks form. If it's too thick, add 1 tsp milk> to loosen it. For extra smoothness, chill the mixing bowl for 15 minutes> before whipping.
How do I prevent soggy ladyfingers?
Dip the ladyfingers quickly> in the cooled coffee syrup—just enough to moisten, not soak. Arrange them immediately> in the dish and press gently. The key is working fast and using a room-temperature syrup> (not cold). If they feel too wet, let them sit on a wire rack for 5 minutes> before layering.
Can I use this recipe for a gluten-free version?
Swap the regular ladyfingers for gluten-free sponge fingers> (like Schär brand). The rest of the recipe stays the same—just ensure your cocoa powder is also gluten-free. For extra insurance, check all ingredients (like instant espresso powder) for hidden gluten.
What's the best way to serve this cake?
Serve chilled in small individual portions> with a dollop of whipped cream and extra cocoa dusting. For a restaurant-style presentation, arrange slices on a platter with dark chocolate curls> and fresh berries. Pair with espresso or chai tea> to enhance the coffee flavors.