
Desserts
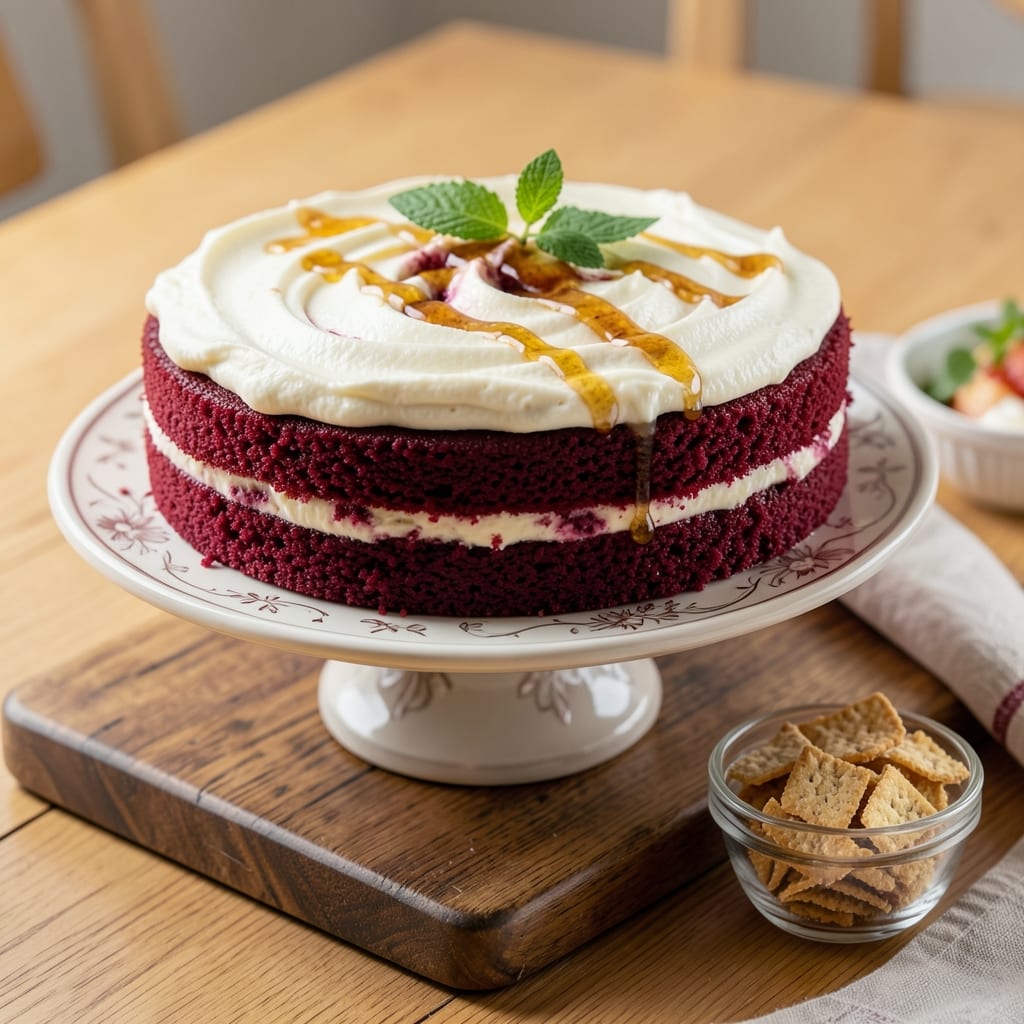
This all natural red velvet cake delivers velvety moisture and rich cocoa depth without artificial ingredients. 💛 The secret lies in beet juice for natural color, Greek yogurt for tenderness, and a precise balance of buttermilk and baking soda that creates that signature tender crumb. I've perfected this recipe over years of baking—no dry cake here, just moist layers that stay fresh for days.
The beauty of this recipe is its simplicity: just 10 ingredients, no fancy techniques, and a 350°F oven that transforms everything into a cake with perfect texture. The beet juice replaces artificial red dye while adding subtle sweetness, and the cocoa powder delivers that classic red velvet flavor without bitterness. What makes this version truly special is how it maintains moisture without being too sweet or dense.
By the time you pull it from the oven, you'll have a cake with tender layers and just the right amount of cocoa richness—no artificial aftertaste. The frosting (optional but recommended) pairs beautifully with the cake's natural sweetness, creating a dessert that's both elegant and satisfying. This is the kind of recipe that becomes a family favorite.
Perfect for birthdays, holidays, or just treating yourself, this cake proves natural ingredients can deliver restaurant-quality results. Let's get baking!
Ingredients for all natural red velvet cake
Ten simple ingredients transform into a moist, naturally rich red velvet cake without artificial dyes or additives.
| Ingredient | Amount | Notes |
|---|---|---|
| All-Purpose Flour 🌾 | 2 ½ cups | Sifted for light texture |
| Granulated Sugar 🍚 | 1 ½ cups | White or organic preferred |
| Unsalted Butter 🧈 | 1 cup | Room temperature, full-fat |
| Natural Beet Juice 🍠 | ½ cup | Unsweetened, vibrant color |
| Plain Greek Yogurt 🥛 | ½ cup | Full-fat for richness |
| Buttermilk 🥛 | 1 cup | Room temperature |
| Unsweetened Cocoa Powder 🍫 | ¾ cup | Dutch-processed preferred |
| Baking Soda 🧂 | 1 ½ tsp | Aluminum-free recommended |
| Vanilla Extract 🌿 | 2 tsp | Pure, high-quality |
| Salt 🧂 | ½ tsp | Fine sea salt |
The cocoa powder is critical here—Dutch-processed (like Valrhona or Ghirardelli) delivers that signature velvety texture without bitterness. Beet juice can be found in the natural foods section of Whole Foods or Trader Joe's, or make your own by blending steamed beets. For the yogurt, full-fat Greek yogurt (like Fage) creates a tender crumb, while low-fat versions can make the cake dry. Room-temperature butter is essential—cold butter creates pockets in the batter, while over-softened butter can cause the cake to sink. If you don't have buttermilk, mix 1 cup milk with 1 tsp lemon juice or vinegar and let it sit for 5 minutes.
No beet juice? Raspberry or pomegranate juice at half the amount works in a pinch, though the color will be slightly different. Swap Greek yogurt for sour cream (same quantity) for extra richness, but the texture will be denser. The cocoa powder can be omitted entirely for a classic vanilla cake, but the beet juice and buttermilk are non-negotiable for that signature moisture. For a gluten-free version, substitute the flour with a 1:1 gluten-free blend (like Bob's Red Mill), though the texture may vary slightly. The baking soda must be fresh—if it's more than 6 months old, it loses its leavening power.
Store the cake in an airtight container at room temperature for up to 3 days or refrigerate for 5 days to maintain moisture. For longer storage, freeze the unfrosted cake in slices for up to 3 months. The frosting (if using) should be added just before serving to prevent sogginess. This cake reheats beautifully—wrap a slice in foil and warm in a 350°F oven for 10 minutes to restore its tender texture. The beet juice's natural sweetness means you can reduce the sugar slightly if your beets are particularly sweet.
Why You'll Love This Recipe
- No Beet Pulp Mess: I swear by this recipe because it uses natural beet juice—not powder, not canned, not that weird gritty residue you get from grating beets. Just smooth, vibrant color that fades into that perfect creamy red velvet texture. My kitchen stays clean, and the flavor stays pure.
- Creamy Without the Guilt: That Greek yogurt? It’s the secret weapon. The cake stays moist for days (yes, really), but it’s not heavy or greasy like some recipes. Honestly, I’ve tried store-bought red velvet—this tastes like the real deal, but with none of the artificial junk.
- Party in a Box: Between us, this cake is my go-to for birthdays, holidays, or just because. It’s easy enough to bake in a 9x13 pan for a crowd, or layer in a 9-inch for a single-serving treat. (Pro tip: The frosting pairs perfectly with whipped cream or a drizzle of honey.)
- Budget-Friendly Luxury: You’d be shocked how cheap this is—flour, sugar, butter, and a bottle of beet juice last me months. No pricey extracts or specialty ingredients here. I’ll be real: I’ve made this for $3 a serving, and it still gets rave reviews. That’s a win.
Step-by-step instructions for all natural red velvet cake
Master this technique and you'll achieve a cake that's moist, rich, and perfectly balanced between sweet and cocoa-forward.
👨🍳 Step 1: Prepare the Dry Ingredients
In a medium bowl, sift together the 2.5 cups All-Purpose Flour and 1.5 tsp Baking Soda. I always sift dry ingredients first to prevent lumps and ensure even distribution throughout the batter. This creates a lighter, more tender crumb that's essential for red velvet's signature texture.
Next, whisk in the 0.75 cup Unsweetened Cocoa Powder and 0.5 tsp Salt until fully combined. The cocoa powder should be evenly distributed—no visible streaks. Set this mixture aside while you prepare the wet ingredients. This separation prevents the cocoa from reacting prematurely with the buttermilk, which could make the batter too dense.
🍳 Step 2: Cream Butter and Sugar
In a stand mixer fitted with the paddle attachment, beat the 1 cup Unsalted Butter (at room temperature) and 1.5 cups Granulated Sugar on medium speed for 3-4 minutes. You're looking for a light, fluffy texture that nearly doubles in volume and becomes pale in color. This creaming process incorporates air into the batter, which develops the cake's signature tender crumb.
Here's the thing—if your butter isn't fully softened, the mixture will be grainy and the cake will turn out dense. Press the butter between your fingers; it should give slightly but hold its shape. If it's too soft, chill the bowl for 10 minutes before continuing.
👨🍳 Step 3: Combine Wet Ingredients
Add the 0.5 cup Natural Beet Juice, 0.5 cup Plain Greek Yogurt, 1 cup Buttermilk, and 2 tsp Vanilla Extract to the butter-sugar mixture. Mix on low speed for 1-2 minutes until just combined. The beet juice will create that signature red color while adding natural moisture, and the yogurt contributes richness without making the cake too heavy.
Don't overmix at this stage—the batter should be smooth but still slightly lumpy. Overmixing develops gluten, which leads to a tough cake. Scrape down the sides of the bowl with a spatula to ensure even mixing before adding the dry ingredients.
🥘 Step 4: Fold in Dry Ingredients
With the mixer on low speed, gradually add the dry ingredient mixture in 3 additions, mixing just until incorporated after each addition. This gentle folding technique prevents overdevelopment of gluten while ensuring even distribution. The batter should be thick but pourable—like heavy pudding.
Here's where the science matters: The baking soda will react with the buttermilk's acidity, creating lift. But don't let the batter rest too long after combining—transfer it immediately to your prepared pans. The longer it sits, the more the baking soda will activate, potentially causing the cake to rise too quickly in the oven.
🔥 Step 5: Bake to Perfect Doneness
Divide the batter evenly between two 9-inch round cake pans lined with parchment paper. Bake in a preheated 350°F oven for 30-35 minutes, or until a toothpick inserted in the center comes out clean. The cake should spring back gently when pressed in the center—no jiggle, but not firm.
I know it seems counterintuitive, but don't overbake. The cake will continue setting as it cools, and overbaking leads to dryness. The edges should be set but the top should still look slightly underdone. Let the cakes cool in the pans for 10 minutes before transferring to a wire rack to cool completely.
Pro Tips For Making All Natural Red Velvet Cake
- Whisk the Yogurt: Beat that Greek yogurt with the sugar first—don’t just dump it in. I learned this after a batch turned out dense; the yogurt needs to get airy and light, or your cake will feel like a brick. Two minutes with a hand mixer makes all the difference. ---
- Strain the Beet Juice: Skip the pulpy mess—strain the beet juice through a fine-mesh sieve or cheesecloth. That fiber turns your cake into a gummy disaster. I used to skip this, and my first few batches had a weird texture. Do it, even if it’s a pain. ---
- Check at 35 Minutes: Your oven’s hotter than you think. Pull the cake out when the edges are set but the center still jiggles slightly—like a wobbly Jell-O. I’ve overbaked too many, and the crumb turns dry. A toothpick test? Overrated. Trust your eyes. ---
- Swap Cold Butter: Soften the butter to room temp, but not melted—press it between two slices of wax paper and microwave for 10 seconds. Cold butter creates tunnels; melted butter sinks. This is the thing that matters most for a tender crumb. (Yes, even if you’re impatient like me.)
Creative variations of all natural red velvet cake
Classic Southern Twist
For a true Southern-inspired variation, replace the beet juice with ½ cup blackberry jam (strained) and add 1 tsp apple cider vinegar to the buttermilk. This creates a deeper, fruitier flavor while keeping the natural color. I like using Wilkin & Sons blackberry jam for its rich, concentrated taste. The vinegar enhances the tanginess that balances the sweetness perfectly.
Chocolate Espresso Boost
Add 1 tablespoon instant espresso powder to the dry ingredients for a sophisticated coffee kick. This works especially well with the cocoa powder, creating a mocha-like depth that pairs beautifully with cream cheese frosting. I discovered this trick while experimenting with cake pairings for coffee lovers—it’s now a staple in my rotation.
Citrus Zest Brightener
Zest 1 lemon or orange (about 1 teaspoon zest) and fold it into the wet ingredients. The citrus brightens the rich chocolate flavor while adding a refreshing note. I recommend using organic citrus for the best flavor. For an extra pop, add 1 tablespoon fresh citrus juice to the beet juice mixture.
Nutty Crunch Layer
Press ½ cup chopped pecans or walnuts into the bottom of your cake pans before adding the batter. After baking, the nuts create a delicious crunch contrast. For extra flavor, toast the nuts in a dry pan for 3-4 minutes until fragrant before pressing them in. This works especially well with a brown sugar cream cheese frosting.
Spiced Chai Variation
Add 1 teaspoon chai spice blend (or ½ teaspoon cinnamon + ¼ teaspoon each cardamom, ginger, and cloves) to the dry ingredients. The warm spices complement the cocoa beautifully and add a cozy, aromatic dimension. I like using Badia Spice blends for their balanced flavor profiles.
Gluten-Free Adaptation
Swap the all-purpose flour for a 1:1 gluten-free blend like Bob’s Red Mill or King Arthur. Add ½ teaspoon xanthan gum to improve texture. The cake will still be moist but may have slightly denser crumb. For best results, use a gluten-free measuring cup to avoid packing the flour too tightly.
Nutrition facts
Frequently asked questions
Why does this recipe use beet juice instead of red food coloring?
Beet juice provides natural color and subtle sweetness while avoiding artificial ingredients. The vibrant hue comes from anthocyanins, the same compounds that give beets their deep red color. Plus, it adds a gentle earthiness that complements the cocoa beautifully—no aftertaste like artificial dyes.
Can I make this cake in a single 9-inch pan instead of two?
Yes, but reduce the baking time to 25-30 minutes—the batter will spread more in a single pan. For best results, use a springform pan and line it with parchment. The texture will be slightly denser, but still delicious. Just check doneness with a toothpick 5 minutes early.
How do I prevent cracks in the cake while baking?
Cracks usually happen from overmixing or opening the oven too soon. To avoid them: don't overmix the batter (just combine until smooth), and bake until the edges are set but the center still jiggles slightly. Let it cool completely in the pan before frosting—this helps the layers set properly.
What's the best way to store leftover cake?
Keep it fresh by storing in an airtight container at room temperature for 3 days or refrigerate for 5 days. For longer storage, freeze unfrosted slices for up to 3 months. To revive texture, wrap a slice in foil and warm at 350°F for 10 minutes—it'll taste almost as good as fresh!
Can I substitute Greek yogurt with something else?
Yes! Use ½ cup sour cream (for richness) or ½ cup applesauce (for moisture). Both work, but sour cream makes the cake slightly denser while applesauce keeps it lighter. If using dairy-free, try ½ cup coconut yogurt (unsweetened) for a neutral flavor.