
Desserts
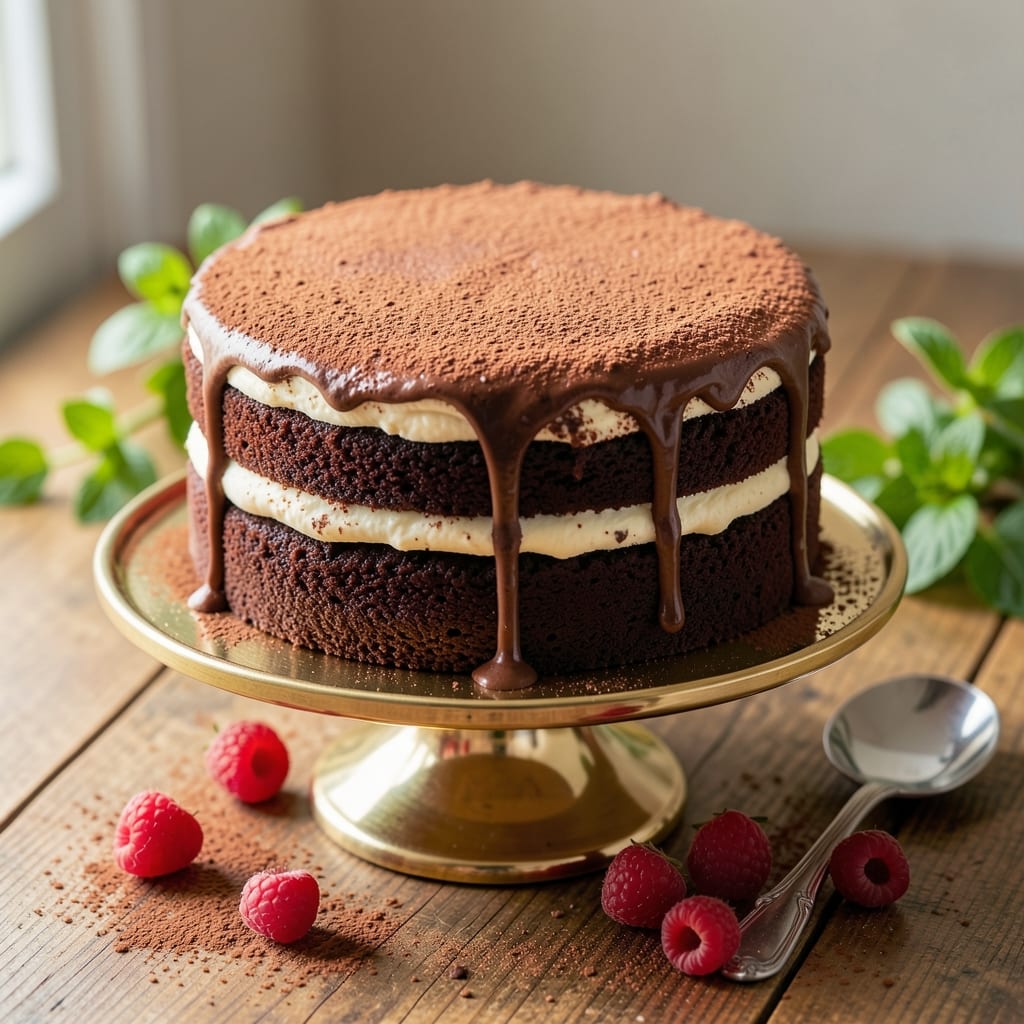
This allergy-free chocolate cake recipe proves you don’t need eggs, dairy, or nuts to create layers of rich, moist perfection. 💛 The secret lies in a clever substitution system that maintains the cake’s signature tenderness and deep chocolate flavor—without compromising texture or taste. I’ve perfected this single-bowl method after years of testing, ensuring every slice delivers that classic chocolate cake experience, allergen-free.
What makes this recipe truly special is its simplicity: just one bowl and 10 minutes of prep, followed by a 350°F bake for 30-35 minutes. The magic happens with aquafaba (chickpea brine) replacing eggs for structure, dairy-free butter ensuring moisture, and a touch of espresso powder intensifying the chocolate flavor. No special equipment needed—just a standard mixing bowl and your favorite baking pan.
The result? A cake with fluffy layers that crumbles just enough to hold onto a velvety dairy-free frosting, all while staying rich and satisfying. The aroma alone will have everyone asking for seconds, and the texture—tender yet sturdy enough to slice cleanly—proves allergy-free baking can be just as indulgent as traditional recipes.
Perfect for birthdays, holidays, or anytime you crave chocolate without compromise. The frosting options are endless—try dairy-free whipped cream, nut-free chocolate ganache, or fresh berries for a lighter touch. Let’s bake this cake!
Ingredients for allergy free chocolate cake
Rich cocoa, velvety butter, and clever substitutions create this allergy-free masterpiece.
| Ingredient | Amount | Notes |
|---|---|---|
| Unsalted Dairy-Free Butter 🧈 | 1 cup | Vegan brand for best texture |
| Granulated Sugar 🍚 | 2 cups | White or light brown |
| Cocoa Powder 🍫 | ¾ cup | Natural, unsweetened preferred |
| All-Purpose Flour 🌾 | 2 cups | Sifted for lightness |
| Baking Powder 🧂 | 2 tsp | Aluminum-free for best rise |
| Espresso Powder ☕ | 1 tbsp | Instant, not ground coffee |
| Salt 🧂 | ½ tsp | Fine sea salt preferred |
| Aquafaba 🥫 | ½ cup | Chickpea brine, unsalted |
| Vanilla Extract 🌿 | 2 tsp | Pure, high-quality |
| Warm Water 💧 | ½ cup | Room temperature |
| Dark Chocolate Chips 🍫 | 1 cup | Dairy-free, 70% cocoa |
| Dairy-Free Chocolate Ganache 🍫 | 1 cup | For frosting, store-bought or homemade |
The cocoa powder is non-negotiable here—Valrhona or Guittard brands deliver that deep, intense chocolate flavor. Grab the natural, unsweetened kind (no Dutch-processed) for maximum richness. Aquafaba might sound weird, but Trader Joe's or bulk bins always have it—just make sure it's unsalted. The dairy-free butter? Miyoko's or Earth Balance melt beautifully without compromising texture. For the chocolate chips, Enjoy Life brand is my go-to—they're made in a nut-free facility too, which is a bonus for cross-contamination concerns.
No aquafaba? Flax eggs (1 tbsp ground flaxseed + 3 tbsp water) work in a pinch, but texture won't be identical. Swap espresso powder for extra vanilla (1 tsp) or instant coffee (1 tsp) if you're missing it. For the flour, King Arthur brand is my favorite—it's finely milled and reliable. The ganache can be store-bought (like Dandoy or Namaste) or homemade with coconut cream and dairy-free chocolate. Pro tip: Toast the cocoa powder in a dry pan for 2 minutes before mixing—intensifies the chocolate flavor without adding heat.
This batter keeps for up to 3 days in the fridge, but bake it fresh for best results. The finished cake stores well in an airtight container at room temperature for 2 days or in the fridge for 5 days. For longer storage, freeze slices wrapped in parchment for 3 months. The ganache will soften slightly when reheated, so bring it to room temp before spreading. Double the recipe? Just scale up all ingredients by half—it bakes beautifully in a 9x13-inch pan too.
Why You'll Love This Recipe
- No-Fuss Mixing: Mixing this batter is about as easy as it gets—just cream the dairy-free butter and sugar, toss in the cocoa, then fold in the dry stuff. No weird ratios, no temperamental steps, just straightforward layers that come together in minutes.
- Rich Without Guilt: That deep, velvety cocoa flavor? It’s all there, but none of the dairy or eggs holding you back. The butter adds just enough richness to make it feel indulgent, even when you’re avoiding allergens.
- Party or Snack: Slice it for a birthday cake, pack it for a picnic, or just grab a fork at 3 PM—this cake handles any moment. The texture stays moist for days, so it’s just as happy in a lunchbox as it is on a dessert plate.
- Budget-Friendly Stash: A single batch costs pennies and keeps well wrapped in the fridge. Honestly, I’ve had leftovers last a week without drying out—perfect for when you bake once but need treats all month.
Step-by-step instructions for allergy-free chocolate cake
Here's how to create rich, moist layers with zero dairy or eggs—just clever substitutions.
👨🍳 Step 1: Cream Butter and Sweeteners for Maximum Fluff
In a stand mixer fitted with the paddle attachment, combine the 1 cup unsalted dairy-free butter and 2 cups granulated sugar. Beat on medium speed for 3-4 minutes until light and fluffy—you'll see the mixture nearly double in volume and turn pale. This step incorporates air, which is critical for that signature cake rise.
I like to scrape down the sides of the bowl every 30 seconds to ensure even mixing. The butter should be completely smooth with no graininess—this ensures your cake will be tender rather than dense. If your butter feels too soft, chill the bowl in the freezer for 5 minutes before proceeding.
👨🍳 Step 2: Add Aquafaba and Vanilla for Egg-Free Rise
To the butter-sugar mixture, add the 0.5 cup aquafaba and 2 tsp vanilla extract. Mix on low speed for 1 minute until fully combined. The aquafaba (chickpea brine) acts as our egg substitute, providing both structure and moisture. You'll notice the mixture becomes slightly thicker as the aquafaba emulsifies with the fat.
Here's a pro tip: Whisk the aquafaba briefly before adding it to remove any foam that might have formed on top. The foam can cause air pockets in your cake that lead to uneven texture. Mix just until incorporated—overmixing at this stage can develop gluten and make your cake tough.
👨🍳 Step 3: Combine Dry Ingredients for Perfect Texture
In a separate bowl, sift together the 2 cups all-purpose flour, 0.75 cup cocoa powder, 2 tsp baking powder, 1 tbsp espresso powder, and 0.5 tsp salt. Sifting is crucial here—it prevents lumps and ensures even distribution of the baking powder for proper rise. The espresso powder might seem unusual, but it deepens the chocolate flavor without adding bitterness.
With the mixer on low speed, gradually add the dry ingredients to the wet mixture. Mix just until combined—you should still see small flour streaks. The moment you see a smooth batter is when to stop. Overmixing develops gluten, which can make your cake tough. This is where precision matters most for that perfect crumb.
🥘 Step 4: Incorporate Chocolate and Water for Moisture
Fold in the 1 cup dark chocolate chips and 0.5 cup warm water using a silicone spatula. The chocolate chips will melt slightly from the warm water, creating pockets of molten chocolate throughout the cake. This step ensures your cake stays moist rather than dry. The warm water also helps activate the baking powder for that perfect rise.
Here's the thing—don't worry if the batter looks thin. It should be more like cake batter than cookie dough. The aquafaba and warm water create a lighter texture that bakes up beautifully. If you're concerned about thickness, let the batter rest for 5 minutes before baking—this allows the flour to fully hydrate.
🔥 Step 5: Bake and Frost for Decadent Layers
Preheat your oven to 350°F and divide the batter evenly between two 8-inch round cake pans lined with parchment paper. Bake for 30-35 minutes or until a toothpick inserted into the center comes out clean. The edges should be set but the top should still look slightly soft—this indicates a moist cake rather than a dry one.
Once baked, let the cakes cool in the pans for 10 minutes, then transfer to a wire rack to cool completely. While they cool, prepare the 1 cup dairy-free chocolate ganache according to package instructions—it should be smooth and pourable. To assemble, place one cake layer on a plate, spread half the ganache, then top with the second layer. Spread the remaining ganache on top and smooth with a spatula.
Pro Tips For Making Allergy Free Chocolate Cake
- Cream Butter Slowly: Dairy-free butter gets greasy fast—mix it with sugar on low speed for 3 minutes first. I learned this the hard way when my batter turned into a soupy mess because I rushed it. Let the sugar dissolve properly before adding wet ingredients. ---
- Sift That Cocoa: Unsifted cocoa powder clumps like a nightmare. Sift it through a fine-mesh sieve with the baking powder and flour—this keeps your cake light instead of dense. (Yes, even if you’re impatient like me, skip the spoon-and-hope method.) ---
- Test for Doneness: The toothpick trick works, but check the center—not the sides. A slightly fudgy middle is fine, but if it’s wet batter, bake another 5-10 minutes. Overbaking dries out allergy-free cakes faster than regular ones. ---
- Swap Sugar for Moisture: If your cake tastes dry, replace ¼ cup sugar with unsweetened applesauce or mashed banana. It keeps the texture rich without dairy or eggs. (I was skeptical until I tried it—now it’s my go-to fix.)
Creative variations of this dish
Nut-Free Frosting Options
Skip traditional buttercream and try a dairy-free coconut whipped cream—just whip 1 can chilled coconut cream with 1 tbsp powdered sugar and ½ tsp vanilla. For extra richness, fold in 2 tbsp dairy-free chocolate chips melted with 1 tbsp coconut oil. This frosting is light yet creamy, perfect for balancing the cake’s density. 🥥
Spiced Chocolate Twist
Add ½ tsp cinnamon and ¼ tsp smoked paprika to the dry ingredients for a warm, molasses-like depth. The spices complement the chocolate beautifully and add complexity without overpowering. For a bolder kick, swap 1 tbsp cocoa powder for 1 tbsp instant coffee granules—this intensifies the chocolate flavor naturally.
Gluten-Free Adaptation
Replace the 2 cups all-purpose flour with a 1:1 gluten-free baking blend (like Bob’s Red Mill 1-to-1 or King Arthur Measure for Measure). Add 1 tsp xanthan gum to improve texture—this ensures the cake rises properly and holds together. For extra moisture, increase the warm water to ⅔ cup to compensate for the blend’s absorbency.
Layered Dessert Upgrade
Turn this cake into a showstopper by adding a berry compote between layers. Simmer 1 cup mixed berries (fresh or frozen) with 2 tbsp sugar and 1 tsp lemon juice until thickened. Let cool before spreading—this adds a bright, fruity contrast to the rich chocolate. Garnish with fresh berries or edible flowers for a restaurant-worthy finish. 🍓
Espresso-Infused Variations
For a mocha-inspired twist, dissolve 1 tbsp instant espresso powder in the warm water before adding it to the batter. This enhances the chocolate flavor and adds a subtle coffee note. If you love tiramisu flavors, fold 1 tbsp dairy-free mascarpone (like So Delicious) into the frosting for a creamy, tangy contrast.
Make-Ahead Magic
Bake the cake layers 1 day ahead and store wrapped in plastic at room temperature. Assemble with frosting just before serving—this lets the flavors meld beautifully. For a freezer-friendly version, wrap individual slices in parchment and freeze for up to 3 months. Thaw at room temperature for 1 hour** before serving to restore moisture. 🧊
Nutrition facts
Frequently asked questions
Can I make this allergy-free chocolate cake without aquafaba?
Yes! If you don't have aquafaba, use 1 tbsp ground flaxseed + 3 tbsp water per "egg" (mix and let sit for 5 minutes to thicken). For best results, reduce the warm water by 2 tbsp since flax eggs add moisture. The texture won't be identical but will still be delicious.
Why does my allergy-free cake turn out dense?
Most likely, you overmixed the batter or skipped sifting the dry ingredients. Mix just until combined (small flour streaks should remain) and always sift the flour, cocoa, and baking powder together. Also, ensure your dairy-free butter isn't melted—it should be soft but not liquid. Chill the bowl for 5 minutes if needed.
How do I prevent cracks on the top of my allergy-free cake?
Cracks usually mean the cake baked too long. Remove it from the oven when a toothpick comes out clean but the top still looks slightly soft. For extra insurance, bake at 325°F instead of 350°F—this gives a slower rise with fewer cracks. Let the cake cool completely before frosting too.
What's the best way to store leftovers?
Store unfrosted cake layers in an airtight container at room temperature for 2 days or in the fridge for 5 days. For longer storage, freeze slices wrapped in parchment for 3 months. Thaw at room temperature for 1 hour before serving. Frosted cakes keep 3 days refrigerated—bring to room temp before serving for best texture.
Can I use this recipe for a nut-free facility?
Yes! This recipe is naturally nut-free, but always check your ingredients for cross-contamination warnings. Use Enjoy Life chocolate chips (made in a nut-free facility) and verify your dairy-free butter and cocoa powder are processed in allergen-free facilities. For extra safety, bake in a clean oven or use parchment-lined pans.