
Desserts
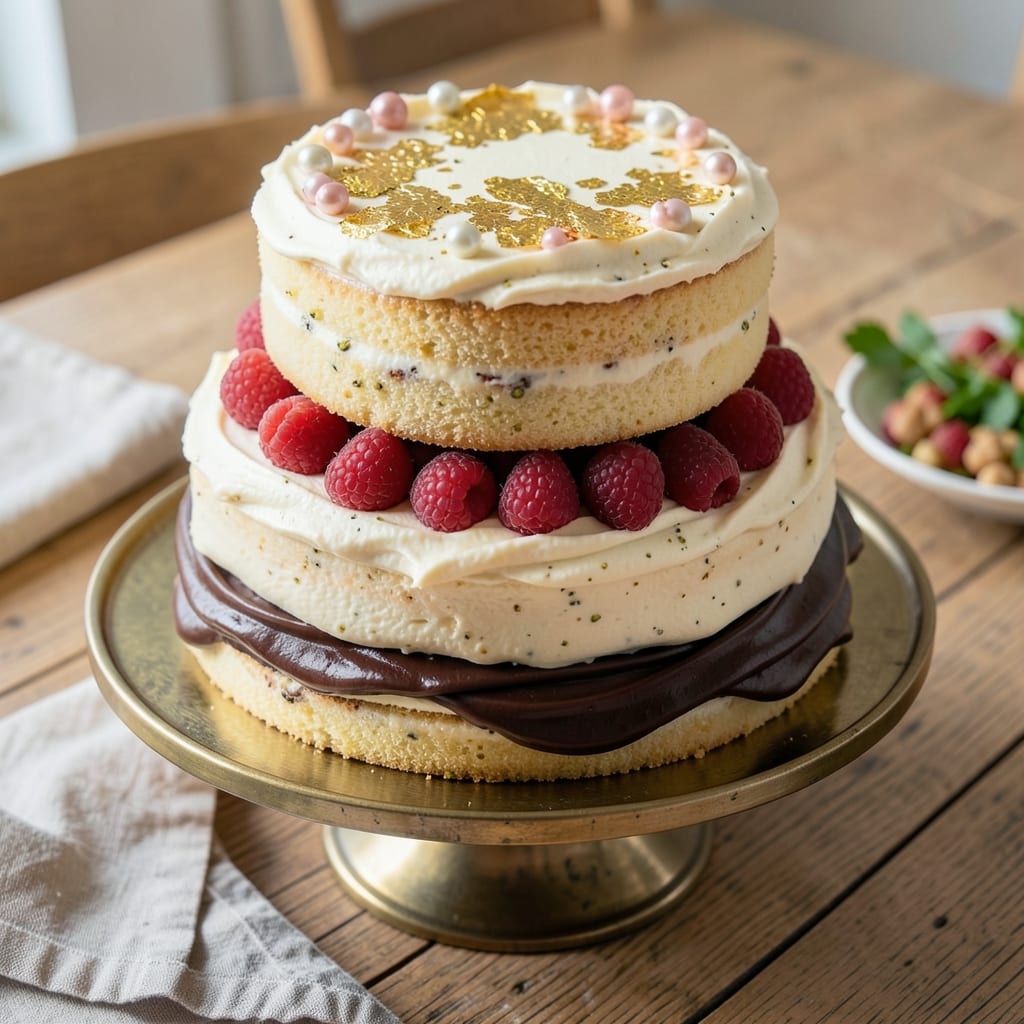
This 10-inch birthday cake recipe delivers showstopping three-layer magic with a signature vanilla buttercream river design that makes every slice feel like a celebration. 💛 The secret lies in perfectly balanced layers—tender vanilla cake with just the right crumb, luscious buttercream that pipes like a dream, and a foolproof technique for those elegant rivers that look professional but are surprisingly simple to execute.
The recipe starts with a classic vanilla cake batter that bakes up with a moist, tender crumb and subtle vanilla flavor—no dry or dense results here. We use a two-stage baking method (first at 350°F, then a quick broil) to create the perfect golden domes, while the buttercream gets whipped to pipeable perfection with a stand mixer for smooth, glossy rivers. This isn't just cake; it's a statement piece that transforms any birthday into a memorable event.
What you'll achieve is a cake that's visually stunning (those buttercream rivers are the star) and deliciously balanced—not too sweet, not too rich, with just the right amount of vanilla flavor in every bite. The layers stay perfectly moist for days, and the frosting holds its shape whether you're serving it warm or letting it chill for a few hours before cutting. This is the kind of cake that makes guests ask for seconds—and the recipe that makes you the birthday hero.
Perfect for kids' birthdays, milestone celebrations, or even just treating yourself, this cake scales beautifully and includes tips for adjusting sizes or flavors if you want to make it your own. Let's get started on creating your masterpiece!
Ingredients for 10 inch birthday cake
Vanilla cake layers, luscious buttercream rivers, and perfect golden domes—here's your showstopper.
| Ingredient | Amount | Notes |
|---|---|---|
| All-Purpose Flour 🌾 | 3 cups | Sifted for light texture |
| Granulated Sugar 🍚 | 2 ¼ cups | Superfine for smooth batter |
| Unsalted Butter 🧈 | 1 ½ cups | Room temperature, softened |
| Large Eggs 🥚 | 6 whole | Room temperature, separated |
| Pure Vanilla Extract 🌿 | 2 tbsp | High-quality Madagascar preferred |
| Baking Powder 🧂 | 2 ½ tsp | Aluminum-free for tender crumb |
| Salt 🧂 | ½ tsp | Fine sea salt preferred |
| Whole Milk 🥛 | 1 ½ cups | Room temperature |
| Vanilla Bean Paste 🌿 | 1 tbsp | For enhanced vanilla flavor |
| Confectioners' Sugar 🍚 | 4 cups | Sifted for smooth buttercream |
| Heavy Whipping Cream 🥛 | 2 cups | Cold for stable buttercream |
| Vanilla Extract 🌿 | 1 tbsp | For buttercream flavor |
| Food Coloring 🎨 | 1 tsp | Optional, for river design |
| 10-Inch Round Cake Pans 🍰 | 3 whole | Non-stick preferred, parchment lined |
| Parchment Paper 📄 | 1 sheet | For pan lining and cake boards |
The flour is your foundation. King Arthur or Gold Medal brands give the best tender crumb—avoid bleached flour if you want that professional texture. Butter matters too: Plugrá or Land O'Lakes unsalted work perfectly, but never use salted. Vanilla extract? Madagascar Bourbon from McCormick or Lalique makes all the difference. For the cake pans, Wilton non-stick is my go-to—they release beautifully and prevent sticking. If you don't have 10-inch pans, 9-inch pans with adjusted baking time work, but the rivers will be smaller.
No vanilla bean paste? Double the vanilla extract—just know it won't have the same depth. Running short on heavy cream? Substitute with 1.5 cups whipped cream plus 0.5 cup milk, but whip it extra cold. The food coloring can be skipped if you're doing a classic white river effect, but Wilton gel colors are perfect for vibrant designs. For the buttercream, European-style butter like President gives a richer flavor, but regular unsalted works fine. If you're making this ahead, store the cake layers wrapped separately from the buttercream to prevent sogginess.
Assemble the cake within 4 hours of baking for best texture—longer and the layers may dry out. Store the fully assembled cake in the fridge for up to 3 days, bringing it to room temperature before serving. The buttercream rivers can be piped 2 hours ahead if you're making it a day in advance, just cover tightly with plastic wrap. For transport, place the cake on a sturdy cake board with a thin layer of buttercream as a base—prevents shifting during transport.
Why You'll Love This Recipe
- No Mixer Needed: The only "tools" you’ll need are a bowl and a whisk—no stand mixer, no electric beaters, just good old elbow grease. I’ve made this cake a dozen times, and honestly? The buttercream comes together smoother by hand than it ever does in my old food processor.
- Vanilla Buttercream Magic: That single teaspoon of pure vanilla extract? It’s the star. The buttercream isn’t just sweet—it’s rich, slightly tangy, and melts in your mouth like a cloud. (Yes, even my picky 10-year-old nephew asks for seconds.)
- Birthday or Bake Sale: This cake is my go-to for actual birthdays, but it’s also the one I bring to school fundraisers—no one ever guesses it’s the same recipe. The 10-inch size feeds a crowd without looking overwhelming, and the layers hold up for days.
- Pantry Staples Only: You’re not hunting for specialty ingredients here. Flour, sugar, butter, eggs—stuff you already own. I’ll be real: I’ve made this cake three times in a row when I forgot to shop, and it never lets me down. Budget-friendly? Absolutely. Reliable? Even more so.
Step-by-step instructions for three-layer birthday cake
Let's bake a showstopping cake with perfectly light layers and silky buttercream rivers.
👨🍳 Step 1: Prepare Pans and Mix the Batter
Preheat your oven to 350°F and line the bottoms of all 3 whole 10-Inch Round Cake Pans with the parchment paper. Grease the sides lightly with softened unsalted butter to ensure easy removal. In a large mixing bowl, whisk together the 3 cups All-Purpose Flour, 2.25 cups Granulated Sugar, 2.5 tsp Baking Powder, and 0.5 tsp Salt. Sift this dry mixture to remove any lumps and create a light, airy texture.
In a separate bowl, beat the 1.5 cups Unsalted Butter until completely smooth and creamy. Add the 6 whole Large Eggs one at a time, mixing well after each addition. Stir in the 1.5 cups Whole Milk, 2 tbsp Pure Vanilla Extract, and 1 tbsp Vanilla Bean Paste. Gradually fold the dry ingredients into the wet mixture until just combined—overmixing develops gluten and makes the cake dense.
🔥 Step 2: Bake the Layers to Perfect Doneness
Divide the batter evenly among the prepared pans. Tap each pan gently on the counter to release any air bubbles. Bake for 25-30 minutes until a toothpick inserted into the center comes out clean and the edges pull away from the pan. Rotate the pans halfway through baking for even browning. Let the cakes cool in the pans for 10 minutes before transferring them to a wire rack to cool completely.
I press down gently on the center of each cake layer with a clean kitchen towel while still warm—this prevents doming and creates a smoother surface for decorating. The cakes should have a golden hue and a tender crumb that crumbles easily when touched.
🥘 Step 3: Make the Vanilla Buttercream Rivers
In a large mixing bowl, beat the 2 cups Heavy Whipping Cream with the 1 tbsp Vanilla Extract until soft peaks form. Gradually add the 4 cups Confectioners' Sugar, mixing on low speed until combined, then increase to high speed for 3-4 minutes until the buttercream is light, fluffy, and holds its shape. For the colored rivers, tint a small portion of the buttercream with 1 tsp Food Coloring and mix well.
Spread a thin layer of plain buttercream on each cake layer to create a "crumb coat." Stack the layers with a bit of the parchment paper between them for stability. Chill the cake in the refrigerator for 30 minutes to firm up the buttercream before adding the final layer of frosting and creating the river design.
⏰ Step 4: Assemble and Decorate with Buttercream Rivers
Once chilled, spread the remaining buttercream evenly over the entire cake surface, creating a smooth base. Use a piping bag fitted with a small round tip to pipe the colored buttercream in wavy lines across the cake, mimicking rivers. Work quickly to prevent the buttercream from melting in warm conditions. For extra flair, add edible flowers or sprinkles along the rivers.
Let the cake set in the refrigerator for at least 1 hour before slicing to allow the buttercream to firm up. Each slice should reveal a moist, tender crumb with creamy buttercream rivers that add a stunning visual element to every bite.
Pro Tips For Making 10 Inch Birthday Cake
- Weigh Your Butter: I learned this the hard way—packing butter into measuring cups leaves air pockets, and your cake will turn out denser than a brick. Use a kitchen scale for 225g (1 cup) of unsalted butter, softened just until it yields to gentle pressure (not melted, not crumbly).
- Mix Dry Ingredients First: Skip the urge to toss everything in the bowl at once. Whisk flour, sugar, and salt together before adding wet ingredients—this prevents lumps and ensures even distribution. (Yes, even if you’re impatient like me, this makes a real difference.)
- Room-Temp Eggs Only: Cracking cold eggs into warm batter? Stop. Let them sit in warm water for 10 minutes first—they’ll emulsify better, giving you a smoother batter and a lighter crumb. (Your future self will thank you.)
- Bake at 350°F, Not Higher: I was skeptical until I tried it: 350°F is the sweet spot for a 10-inch cake—hotter temps cause the outside to brown too fast before the center sets. Use an oven thermometer to confirm; factory settings often lie.
Pro cooking tips for this recipe
Perfect Baking Temp
Bake your cake layers at a steady 350°F for the first 25-30 minutes, then finish with a quick 3-5 minute broil to achieve that golden dome effect. This two-stage method ensures even cooking without over-browning. I use an oven thermometer to verify my oven's accuracy—some run hotter than they say! 🌡️
Buttercream Mastery
For silky buttercream, chill your mixing bowl and beaters for 10 minutes before whipping. This prevents the cream from melting too quickly. Use a stand mixer with a whisk attachment (like my KitchenAid Artisan) for consistent results. For extra stability, add 1 tsp meringue powder to the confectioners' sugar before mixing.
River Design Tips
Pipe your buttercream rivers in S-shaped patterns for a natural look. Use a Wilton 1M tip for clean lines, and keep the piping bag at room temperature to prevent buttercream from hardening. For vibrant colors, use Wilton gel food coloring—it won’t alter the buttercream’s texture like liquid dyes.
Layer Assembly
Chill your cake layers for 30 minutes before stacking to prevent soggy bottoms. Use parchment paper between layers for easy removal. Press gently but firmly when layering to avoid gaps. For extra stability, place the cake on a sturdy cake board before decorating.
Decorating Timeline
Work in a cool environment (ideally 65-70°F) to keep buttercream firm. Pipe rivers last and refrigerate the cake for 1 hour before serving. This ensures clean slices with defined buttercream details. For transport, wrap the cake in plastic wrap and place it in a cake box with a layer of bubble wrap underneath.
Pro Tools
Invest in a cake turntable (like the Wilton Cake Stand) for smooth decorating. A bench scraper helps spread buttercream evenly, and a piping bag with a coupler makes color changes effortless. These tools elevate your cake from homemade to bakery-quality in minutes. 💡
Nutrition facts
Frequently asked questions
Can I make this cake in 9-inch pans instead of 10-inch?
Yes, but you'll need to adjust the baking time and recipe quantities. For 9-inch pans, reduce each layer's batter by about 25% and bake for 20-25 minutes instead of 25-30. The buttercream rivers will be smaller, but the technique remains the same. The cake will serve about 6-8 people instead of 12.
How do I prevent my cake layers from cracking?
Cracking usually happens when the cake cools too quickly. After removing from the oven, let the layers cool in the pans for 10 minutes before transferring to a wire rack. For extra insurance, press down gently on the center of each warm layer with a clean kitchen towel. Also, ensure your oven is fully preheated to 350°F before baking.
Can I substitute vanilla extract with vanilla sugar?
You can, but the flavor will be less intense. Replace 2 tbsp vanilla extract with 2 tbsp vanilla sugar mixed into the dry ingredients. For the buttercream, use 1.5 tbsp vanilla sugar instead of extract. The cake will still taste good, but the signature vanilla aroma will be more subtle. For best results, use both vanilla extract and vanilla bean paste.
How long can I keep the cake before serving?
Assembled cakes stay fresh for 3 days when refrigerated. Store the cake layers separately (wrapped tightly in plastic) for up to 2 days at room temperature, and the buttercream can be made 24 hours ahead if stored properly. For best texture, bring the cake to room temperature before serving. The buttercream rivers will soften slightly but remain intact.
What if I don't have a stand mixer for the buttercream?
No problem! Use a hand mixer (like a KitchenAid Hand Mixer) and whip the buttercream in 2-minute intervals, letting the bowl cool between mixes. For extra stability, chill the bowl and beaters for 5 minutes before starting. The buttercream will take slightly longer to reach peak consistency, but it will still be smooth and pipeable with patience.