
Desserts
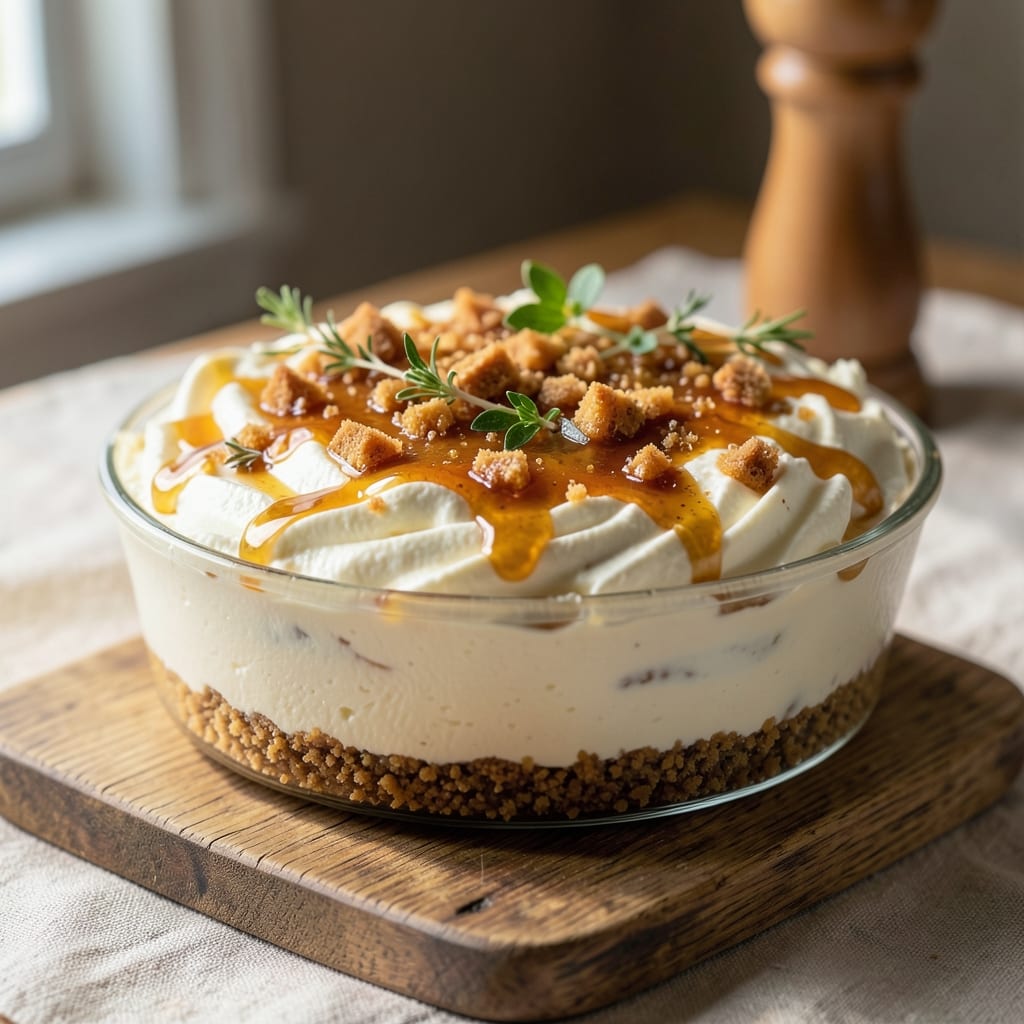
This amazing no-bake cheesecake recipe delivers restaurant-quality results without ever turning on your oven. ✨ The secret lies in a creamy, velvety filling that sets perfectly in the fridge while a buttery graham cracker crust holds everything together—no baking skills required, just patience and a few simple ingredients.
What makes this recipe truly amazing is the silky-smooth texture that comes from blending cream cheese with sour cream and sweetened condensed milk. No eggs, no water bath, and no risk of cracking—just pure, creamy perfection that requires only 15 minutes of prep and 4 hours of chilling. The crust stays crisp while the filling remains luscious, making each bite feel like a decadent dessert.
By the time you slice into this cheesecake, you'll have a dessert that looks and tastes like it came from a bakery, not your kitchen. The filling is rich yet light, with just the right amount of sweetness that balances the buttery crust. Top it with fresh berries, whipped cream, or a drizzle of chocolate for that final wow factor.
Perfect for last-minute gatherings, potlucks, or when you just can't resist dessert cravings. Here's how to make it happen without the oven heat or the mess.
Ingredients for amazing no bake cheesecake
Just 12 ingredients transform your fridge into a no-bake cheesecake bakery.
| Ingredient | Amount | Notes |
|---|---|---|
| Graham Crackers 🍪 | 1 ½ cups | Crushed into fine crumbs |
| Unsalted Butter 🧈 | ½ cup | Melted, full-fat preferred |
| Granulated Sugar 🍚 | ½ cup | For crust sweetness |
| Cream Cheese 🧀 | 16 oz | Full-fat, room temperature |
| Sour Cream 🍶 | 1 cup | Full-fat for creaminess |
| Sweetened Condensed Milk 🥛 | 1 can (14 oz) | Unopened can for stability |
| Vanilla Extract 🌿 | 1 tbsp | Pure alcohol-free preferred |
| Lemon Juice 🍋 | 1 tbsp | Freshly squeezed |
| Heavy Whipping Cream 🥛 | 1 cup | Chilled for stability |
| Salt 🧂 | ¼ tsp | Fine sea salt |
| Whipped Cream 🍦 | ½ cup | Optional garnish |
| Fresh Berries 🍓 | 1 cup | For topping (optional) |
The cream cheese is non-negotiable here—full-fat makes all the difference. Philadelphia is my go-to brand, but any block-style cream cheese works. Room temperature is key: take it out of the fridge 30 minutes before using so it blends smoothly. For the crust, Honey Maid graham crackers are my favorite—they're sturdy and sweet enough to stand up to the filling. If you're using the mini ones, crush them extra fine so the crust stays crisp. The condensed milk can is a game-changer: don't open it until you're ready to use it—it thickens fast once exposed to air.
No sour cream? Greek yogurt works at half the amount, but it won't be quite as rich. Running out of vanilla? Almond extract at one-quarter the amount gives a nice twist. The whipped cream can be store-bought (like Cool Whip), but homemade is lighter and sweeter. For the berries, strawberries or raspberries hold up best—they won't turn mushy like blueberries. Pro tip: toss them in a little sugar before adding to the cheesecake. The lemon juice might seem small, but it brightens the whole thing—don't skip it.
This cheesecake needs 4 hours minimum in the fridge to set properly, but it tastes even better the next day. Store leftovers covered in the fridge for up to 5 days. For parties, make it 24 hours ahead—the flavors meld beautifully. The crust stays crisp if you press it firmly into the pan. If it softens, just pop it back in the fridge for 10 minutes before serving. Freezes for up to 2 months if wrapped tightly in plastic wrap and foil—just thaw overnight in the fridge.
Why You'll Love This Recipe
- No Oven Needed: Honestly, I love that this cheesecake doesn’t require baking—just a fridge and 15 minutes of hands-on time. The crust gets pressed into the pan while the filling chills, so you’re basically setting it and forgetting it.
- Crusty-Creamy Magic: That buttery graham cracker crust with melted butter? It’s the move—crunchy edges that hold up against the silky cream cheese filling. The sour cream keeps it light, so it’s not too heavy, even when you cut yourself a second slice.
- Party-Proof Prep: Between us, this is my secret weapon for last-minute gatherings. Make it ahead, slice it up, and no one will guess it’s no-bake. Add berries or a drizzle of caramel for fancy occasions, or serve it plain for a lazy Sunday.
- Budget-Friendly Leftovers: I always end up with extra, and that’s okay—it keeps for days in the fridge without drying out. The cream cheese and sour cream stretch further than you’d think, and the graham crackers make it feel special without breaking the bank.
Step-by-step instructions for no-bake cheesecake
Here's how to create a velvety, no-bake cheesecake that requires zero oven time.
👨🍳 Step 1: Prepare the Crust with Perfect Texture
Preheat your oven to 350°F—yes, just for the crust. In a food processor, pulse the 1.5 cups graham crackers until you get fine crumbs, about 10-15 seconds. You want them to resemble sand, not coarse pieces. This ensures an even, sturdy base that won't crumble when we add the filling.
In a medium bowl, melt the 0.5 cup unsalted butter in the microwave for 30-45 seconds (or melt it in a saucepan over low heat). Stir in the 0.5 cup granulated sugar and the 0.25 tsp salt until combined. Add the graham cracker crumbs and mix until everything is evenly coated and looks like wet sand.
Press this mixture firmly into the bottom of a 9-inch springform pan, using the back of a spoon or your fingers. Pack it down tightly so it forms a solid layer. Bake for 8-10 minutes until golden at the edges. Let it cool completely before adding the filling—this prevents a soggy bottom. I like to press down extra hard on the edges to create a nice border for the filling.
🥘 Step 2: Whip the Cream Cheese Filling
While the crust cools, grab your 16 oz cream cheese and let it sit at room temperature for 30 minutes if it's cold from the fridge. This prevents lumps in your filling. In a large mixing bowl, beat the cream cheese with an electric mixer on medium speed until completely smooth—about 2-3 minutes. You'll know it's ready when it looks like thick, pale yellow pudding.
Add the 1 cup sour cream and beat for another 1 minute until fully incorporated. The mixture should be smooth and creamy. Here's where the magic happens: pour in the 1 can (14 oz) sweetened condensed milk, the 1 tbsp vanilla extract, and the 1 tbsp lemon juice. Mix on low speed to avoid splattering, then increase to medium and beat for 2-3 minutes until everything is perfectly combined and glossy.
Real talk: Don't skip the lemon juice. It brightens the flavor and balances the richness of the cream cheese and condensed milk. If you're using fresh lemon juice, strain it first to avoid any pulp getting into your mixture.
🍳 Step 3: Fold in the Whipped Cream
In a separate bowl, whip the 1 cup heavy whipping cream with clean beaters until it forms soft peaks—about 2-3 minutes. You want it thick but not stiff. Gently fold this whipped cream into your cream cheese mixture using a spatula, being careful not to deflate the whipped cream. This step creates that signature light, airy texture that makes no-bake cheesecakes so irresistible.
Once fully combined, pour the filling over the cooled crust. Smooth the top with a spatula, making sure it covers the entire crust evenly. Here's the thing—don't worry if it doesn't look perfect. We'll fix any imperfections with the whipped cream topping later. Tap the pan gently on the counter a few times to release any air bubbles that might have formed.
⏰ Step 4: Chill and Set for Maximum Stability
Cover the cheesecake tightly with plastic wrap and refrigerate for at least 4 hours, but I recommend 6-8 hours for the best results. This long chilling time is crucial—it allows the filling to fully set and develop that perfect silky texture. I like to place it on a tray to catch any drips, just in case.
Here's a pro tip: If you're in a hurry, you can speed up the chilling process by placing the pan in the freezer for 1 hour, then finishing in the fridge. But don't rush this step if you can help it. The longer it chills, the smoother and more stable your cheesecake will be when you slice it.
🍽️ Step 5: Garnish and Serve with Confidence
Once fully set, remove the cheesecake from the fridge and let it sit at room temperature for 10-15 minutes before serving. This makes it easier to slice and prevents a messy crumbly texture. In a separate bowl, whip the 0.5 cup whipped cream until it forms stiff peaks. Spread this over the top of the cheesecake, then arrange the 1 cup fresh berries on top for a beautiful presentation.
Use a sharp knife to cut the cheesecake into slices. Here's what you're aiming for: clean slices with a smooth, creamy texture that holds its shape. If it's too soft when you take it out of the fridge, give it another 30 minutes to firm up. Serve immediately and watch it disappear—this cheesecake is that good.
Pro Tips For Making Amazing No Bake Cheesecake
- Chill the Crust First: Pop your graham cracker crust into the fridge for 15 minutes before adding the filling—this prevents soggy bottoms. I learned this the hard way after serving a cheesecake where the crust dissolved into a slurry. ---
- Whip Cream Cheese Cold: Use cream cheese straight from the fridge—it whips faster and holds its shape better. Room temperature? Skip it. You want fluffy, not greasy. ---
- Avoid Overmixing Filling: Mix the sour cream and cream cheese just until combined—no need for a smooth batter. Overmixing traps air and can make the texture grainy. ---
- Press Crust Firmly: Pack the graham cracker crumbs into the pan with the back of a spoon, pressing down hard. A loose crust means a weak base—no one wants a crumbly foundation.
Serving suggestions for this recipe
Plating Like a Pro
Start by dusting the edges of your cheesecake with a light layer of powdered sugar using a fine-mesh sieve. This creates a professional finish that catches the light beautifully. I like to use a 2-inch offset spatula to gently smooth any imperfections on the whipped cream topping before adding garnishes. For extra elegance, use a piping bag with a star tip to create delicate swirls of whipped cream around the berries. 💫
Topping Variations
Fresh berries are classic, but don't be afraid to get creative. A drizzle of dark chocolate ganache (melt ½ cup chocolate chips with ¼ cup heavy cream) adds richness. For a tangy twist, try a raspberry coulis made by blending 1 cup frozen raspberries with 2 tbsp sugar and straining. Caramelized nuts like pecans or walto add crunch—just toast ½ cup chopped nuts in a dry pan for 3-4 minutes until golden.
Portioning for Parties
For gatherings, cut the cheesecake into 12 equal wedges using a sharp, hot knife (dip it in hot water between slices). Wrap individual portions in parchment paper and secure with a rubber band for easy transport. I like to place each slice on a small dessert plate with a dollop of whipped cream and a single berry for a restaurant-style presentation. Serve with a side of vanilla bean ice cream for the ultimate indulgence.
Seasonal Garnishes
Spring calls for strawberries and mint leaves, while summer begs for peaches and basil. In autumn, try candied pecans and cinnamon sugar—toss ½ cup chopped pecans with 1 tbsp melted butter, 2 tbsp brown sugar, and a pinch of cinnamon, then bake at 350°F for 8 minutes. Winter desserts shine with cranberries and orange zest—simmer ½ cup cranberries with 1 tbsp orange juice for 5 minutes before arranging on top.
Make-Ahead Serving
This cheesecake actually tastes better the next day, so make it 24 hours ahead for parties. Store leftovers covered in the fridge for up to 5 days. To serve, let slices sit at room temperature for 10 minutes before presenting. For a special touch, place the cheesecake on a decorative plate and surround it with edible flowers** or a sprinkle of crushed pistachios for color contrast. The key is to let it warm slightly so the filling is creamy but not melted. 🍓
Nutrition facts
Frequently asked questions
Can I make this no-bake cheesecake without a springform pan? Yes, you can use a regular 9-inch round cake pan with removable sides or even a pie dish. If using a pie dish, grease it well and press the crust firmly into the edges. For a non-removable pan, line the bottom with parchment paper to prevent sticking. Just
Why did my no-bake cheesecake filling not set properly?
Under-chilling is the most common reason. The filling needs at least 4 hours in the fridge—6-8 hours is ideal. If your kitchen is warm, try chilling it in the freezer for 1 hour first, then finish in the fridge. Also, make sure your cream cheese and heavy cream are fully chilled before mixing—they help stabilize the texture. Pro tip: Tap the pan gently on the counter before chilling to release air bubbles.
What can I substitute if I don't have sour cream?
Use Greek yogurt (½ cup) or crème fraîche (¾ cup) as a 1:1 substitute, but the texture will be slightly denser. For a lighter option, whip ½ cup heavy cream until soft peaks form and fold it into the filling instead. Avoid regular yogurt—it's too thin and can make the cheesecake watery. The sour cream adds tanginess that balances the sweetness, so try to find an alternative with similar acidity.
Can I make this cheesecake ahead of time?
This cheesecake actually tastes better after 24 hours in the fridge. The flavors meld beautifully, and the texture becomes even smoother. For parties, assemble it 1 day ahead—just cover it tightly with plastic wrap and store in the fridge. Bring it to room temperature for 30 minutes before serving to make slicing easier. Freezing isn't recommended, as the texture can become grainy.
How do I fix a cracked or crumbly crust?
If the crust crumbles when pressing it into the pan, crush the graham crackers even finer (almost like sand). For cracks, press the edges of the crust firmly into the pan before baking to create a barrier. If cracks appear after chilling, spread a thin layer of whipped cream over the filling before adding toppings—it acts as a protective seal. For a quick fix, dust the top with powdered sugar to camouflage minor imperfections.