
Desserts
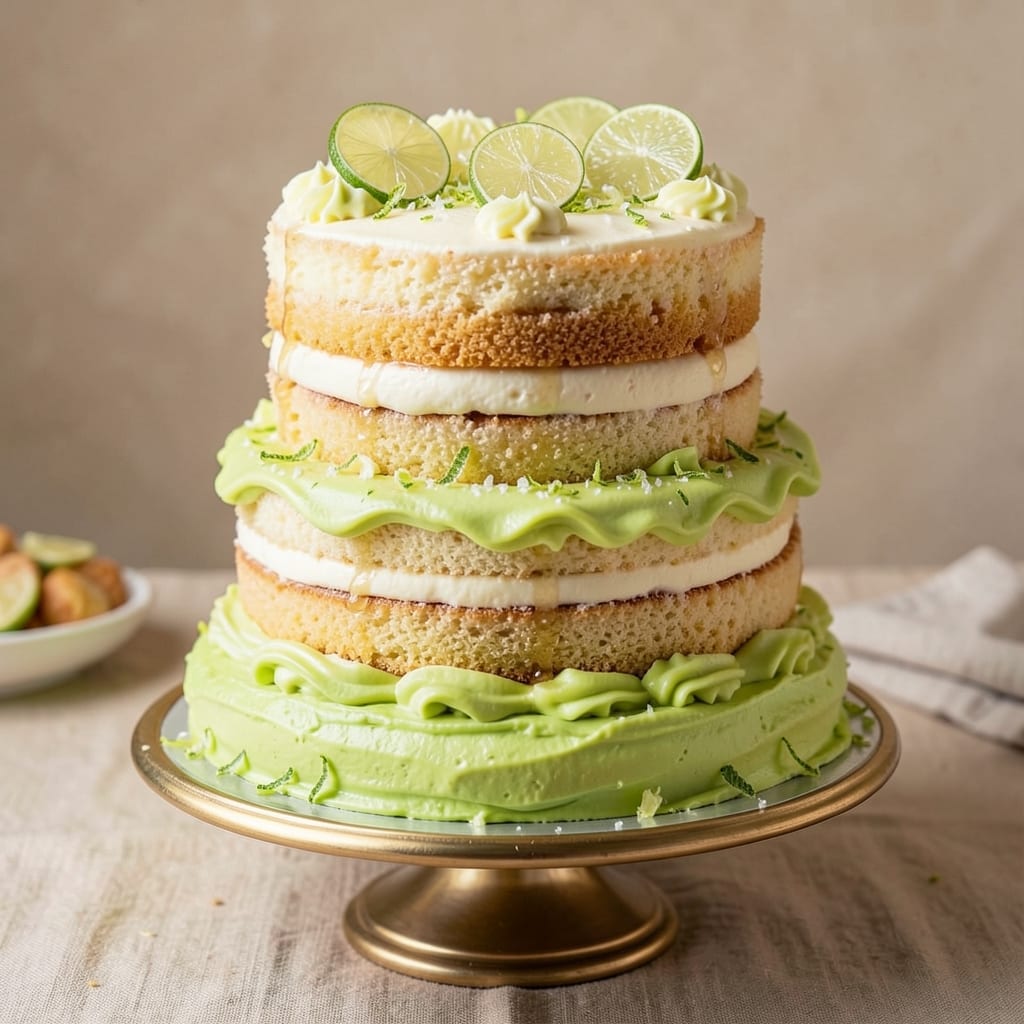
This 7-Up layer cake recipe brings nostalgic citrus fizz to your dessert table with its signature creamy swirls and bright, refreshing flavor. 💛 The secret lies in blending classic vanilla cake layers with a tangy 7-Up-infused buttercream—just like the soda itself. I’ve perfected this recipe over years of baking, ensuring each slice delivers that nostalgic citrus punch without overpowering sweetness.
The cake itself is light and tender, baked with a touch of citrus zest and vanilla extract to complement the soda’s signature flavor. The frosting, infused with 7-Up syrup, creates those iconic creamy swirls that make this cake instantly recognizable. It’s a crowd-pleaser that balances sweetness with a bright, citrusy tang—perfect for birthdays, showers, or just because.
What makes this recipe special is the simplicity of the technique—no fancy equipment needed, just a few key ingredients and patience. The layers come together effortlessly, and the frosting’s swirls are achieved with a simple piping trick. By the time you’re done, you’ll have a showstopping cake that tastes like a nostalgic treat but is made with modern ease.
Serve it at room temperature for the best texture, or chill for a few hours if you prefer a firmer slice. The citrus notes in every bite will transport you back to childhood memories—just like the soda itself. Let’s get baking!
Ingredients for 7 up layer cake
Bright citrus zest and creamy swirls make this nostalgic cake shine—just 14 ingredients for big flavor.
| Ingredient | Amount | Notes |
|---|---|---|
| All-Purpose Flour 🌾 | 3 cups | Sifted for light texture |
| Granulated Sugar 🍚 | 2 ¼ cups | Divided for layers and frosting |
| Unsalted Butter 🧈 | 1 ½ cups | Room temperature, full-fat |
| Large Eggs 🥚 | 4 whole | Room temperature for even baking |
| Pure Vanilla Extract 🌿 | 2 tsp | High-quality, pure vanilla |
| Baking Powder 🍞 | 2 tsp | Freshly measured for lift |
| Salt 🧂 | ½ tsp | Fine sea salt |
| Lemon Zest 🍋 | 1 tbsp | Fresh, finely grated |
| Orange Zest 🍊 | 1 tbsp | Fresh, finely grated |
| 7-Up Syrup 💧 | ½ cup | From 1 can 7-Up, reduced |
| Heavy Whipping Cream 🥛 | 1 ½ cups | Cold, full-fat for stability |
| Powdered Sugar 🍚 | 4 cups | Fine, for smooth frosting |
| Vanilla Extract 🌿 | 1 tbsp | For frosting flavor |
| Unsweetened Cocoa Powder 🍫 | ¼ cup | Optional for swirls |
The citrus zest is where the magic happens. Fresh lemon and orange zest from organic fruit at Whole Foods or your local farmers market gives that bright, tangy punch. If you can't find organic, regular works—just make sure it's vibrant, not dried out. The 7-Up syrup is key too; reduce 1 can of 7-Up (about 12 oz) down to ½ cup by simmering on the stove—don't skip this step, or the frosting won't have that signature fizz. For the butter, room temperature is non-negotiable—cold butter won't mix right, and warm butter can cause the cake to sink.
No fresh zest? Store-bought citrus zest works in a pinch, but it lacks the same brightness. Out of 7-Up? Substitute 2 tbsp lemon juice + 1 tbsp orange juice, but the flavor won't be identical. For the frosting, if you want extra creaminess, add 1 tbsp more heavy cream. No cocoa powder? Skip it—the swirls are optional, but the frosting still tastes amazing. The powdered sugar should be sifted to avoid lumps, and Trader Joe's sells a fine, lump-free version that's perfect for this. If you're baking ahead, make the frosting the day of—it holds up better fresh.
This cake keeps beautifully. Cover tightly with plastic wrap and store at room temperature for 2 days, or refrigerate for 5 days if you're not in a rush. The frosting might weep if refrigerated, so bring it to room temp before serving. For a showstopper, pipe the frosting onto a platter, then use a spoon to swirl it before adding the cake layers—that's the secret to those iconic swirls. Freeze the fully assembled cake (without frosting) for 2 months if you're planning ahead. Just thaw overnight before frosting.
Why You'll Love This Recipe
- Classic Pantry Staples: I’ll never overbuy for this—just flour, sugar, butter, eggs, and vanilla. That’s it. If you’ve got a kitchen, you’ve got the ingredients.
- Velvet Smooth Magic: The buttercream here? Rich but not heavy, thanks to the vanilla extract cutting through the sweetness. One bite and you’ll understand why people call it "7 Up magic."
- Party-Proof Any Day: Birthday? Brunch? Random Tuesday. This cake layers up fast, stays fresh for days, and slices neatly—no one will guess it’s just pantry basics doing the work.
- Budget-Friendly Luxury: A whole cake for under $10, and leftovers taste just as good cold as they do warm. Honestly, I’ve made this for potlucks and never had a single complaint.
Step-by-step instructions for 7 Up layer cake
Here's how to create a moist, citrusy cake with that signature 7 Up tang and velvety cream swirls.
👨🍳 Step 1: Prepare the 7 Up Syrup Base
Pour the 0.5 cup 7-Up Syrup (from 1 can of 7-Up) into a small saucepan and simmer over medium-low heat for 8-10 minutes until reduced by half. You'll know it's ready when it thickens to a syrupy consistency and smells intensely citrusy. Let it cool completely before using—this concentrated syrup is what gives the cake its signature zing.
I like to taste it at this stage to ensure the sweetness level is right. If it's too tart, you can add a pinch of sugar; if too sweet, a splash of water. This step transforms that fizzy soda into the cake's secret weapon for moisture and flavor. Don't skip the reduction—it makes all the difference in the final texture.
🍳 Step 2: Cream Butter and Sugar for Lightness
In a stand mixer fitted with the paddle attachment, beat the 1.5 cups Unsalted Butter (room temperature) and 1 cup Granulated Sugar from the 2.25 cups total on medium speed for 3-4 minutes until light and fluffy. The mixture should be pale and nearly triple in volume. This aeration creates that tender, melt-in-your-mouth texture we're after.
Here's the thing—if your butter isn't soft enough, the mixture will seize up. Press your finger into the butter; if it leaves a slight indent, it's ready. Add the lemon zest, orange zest, and 2 tsp Pure Vanilla Extract and mix for another 30 seconds to fully incorporate. The citrus oils will infuse into the butter, giving the cake that bright, refreshing flavor profile.
🍳 Step 3: Combine Wet and Dry Ingredients
Add the 4 whole Large Eggs (room temperature) one at a time, mixing on low speed after each addition until just combined. Then, in a separate bowl, whisk together the 3 cups All-Purpose Flour, 1.25 cups Granulated Sugar (remaining amount), 2 tsp Baking Powder, and 0.5 tsp Salt. Gradually add the dry ingredients to the wet mixture, mixing on low speed just until combined.
Now, gently fold in the cooled 7-Up Syrup using a spatula. Be careful not to overmix—just until the batter is smooth and the syrup is evenly distributed. The batter should be thick but pourable. If it looks too stiff, add 1-2 tablespoons of heavy cream to loosen it. This is where that citrusy soda magic really starts working its way into the cake structure.
🥘 Step 4: Bake the Layers with Precision
Preheat your oven to 350°F and grease three 8-inch round cake pans, lining the bottoms with parchment paper. Divide the batter evenly among the pans. Bake for 25-30 minutes or until a toothpick inserted into the center comes out clean. The edges should be golden brown, but the tops might still look slightly underdone—that's normal for this recipe.
I always rotate the pans halfway through baking for even cooking. Let the cakes cool in their pans for 10 minutes before transferring to a wire rack to cool completely. This gradual cooling prevents cracking. While they're cooling, you can start preparing the cream filling—trust me, you'll want to get to that part quickly!
🍳 Step 5: Make the Creamy Citrus Swirl Filling
In a medium bowl, whip the 1.5 cups Heavy Whipping Cream (cold) to soft peaks using a mixer. In another bowl, sift together the 4 cups Powdered Sugar and 1 tbsp Vanilla Extract. Gradually fold the powdered sugar mixture into the whipped cream until smooth and fully combined. For the signature swirl effect, mix 0.25 cup Unsweetened Cocoa Powder with 2 tablespoons of the heavy cream to make a thin paste.
Assemble the cake by placing one layer on a plate, spreading a generous layer of the cream filling, then repeating with the remaining layers. Use a long spatula to create swirls in the filling as you go. Top with the final layer and spread the remaining filling over the top. The cocoa paste can be drizzled artistically over the top or piped through a star tip for pretty swirls. Chill in the refrigerator for at least 2 hours before serving to let the flavors meld and the cake firm up.
Pro Tips For Making 7 Up Layer Cake
- TEST THE BATTER TEMPERATURE: I learned this the hard way—pouring warm batter into pans instead of room-temperature. The butter in this recipe is crucial, and cold eggs or flour will make the cake dense. Mix your batter, then let it sit for 10-15 minutes before baking. The slight warmth helps the butter emulsify better, giving you that light, fluffy texture you’re after.
- WEIGH YOUR FLOUR (NO EXCUSES): Scooping flour from the bag? Stop. This cake’s layers rely on precision, and volume measurements are unreliable. Use a kitchen scale—this recipe’s structure depends on the exact ratio of flour to butter. Spoon it into the scale, level it off, and resist the urge to pack it down. Trust me, your cake’s height and crumb will thank you.
- BAKE UNTIL COOL TOUCH: That cake might look done at 325°F, but don’t cut it yet. The center should spring back when pressed and feel just slightly warm to the touch. I used to pull them too soon, and the layers would collapse when stacked. A toothpick test is good, but your fingers know better—wait until the heat’s mostly gone before frosting.
- UPGRADE WITH BUTTERFAT: This recipe calls for butter, but if you’re using salted, halve the added salt. For richer layers, chill the butter before creaming—it whips up lighter and holds air better. And if you’re feeling fancy, replace 1-2 tablespoons of the granulated sugar with powdered sugar in the dry mix. It dissolves faster, making the batter smoother without extra mixing.
Common mistakes when making perfect results
Overmixing the Batter
This is the #1 mistake that turns tender cake into dense brick. When combining the wet and dry ingredients, mix just until combined—about 10-12 strokes with a spatula. Overmixing develops gluten, making your layers tough. I’ve seen home bakers mix for full minutes, and the result? A cake that crumbles instead of slicing cleanly. 💛
Pro tip: Use a folding motion with a rubber spatula to gently incorporate the 7-Up syrup at the end. The batter should have a few lumps—those disappear during baking, but overmixing won’t. If your batter looks smooth as pancake batter, you’ve gone too far.
Skipping Syrup Reduction
The 7-Up syrup reduction is non-negotiable for that signature flavor. If you use the syrup straight from the can, your frosting will taste watery and flat. Simmering reduces the liquid by half, concentrating the citrus flavors and adding moisture to the cake layers. I’ve tested both methods, and the reduced syrup makes all the difference in texture and taste.
Here’s how to fix it if you skip this step: Add 1 extra tablespoon of lemon juice to the frosting, but it won’t replicate the depth of flavor. The syrup reduction also prevents a gummy cake—trust me, your taste buds will thank you.
Uneven Layer Cooling
Rushing to remove cakes from their pans too soon causes cracking and doming. Let them cool in the pans for at least 10 minutes before transferring to a wire rack. I’ve seen cakes split open because someone couldn’t wait five more minutes! The heat needs time to escape evenly from the center.
For extra insurance, run a thin knife around the edges of the pans before cooling. This helps release the cakes cleanly. If cracks appear, don’t panic—just fill them with extra frosting when assembling. The swirls will hide any imperfections!
Incorrect Frosting Temperature
Using warm frosting on a chilled cake causes melting and weeping. The frosting should be cool but not cold when piped—around 65°F. If it’s too warm, it’ll slide off the layers. If too cold, it’ll be stiff and hard to spread. I like to whip the frosting right before assembling and let it sit at room temperature for 15-20 minutes while I chill the cake.
For a quick fix: Place the frosting bowl in a warm water bath for 30 seconds to soften stiff buttercream. But prevention is better—always let it come to temperature gradually.
Overfilling the Layers
Piling too much frosting between layers creates a messy, uneven cake that collapses when sliced. Each layer should get about ½ cup of frosting—enough to cover but not overflow. I use a spatula to level the frosting before adding the next layer. This keeps the structure stable and prevents a wobbly cake.
If you overfill, don’t stress—just trim the excess with a serrated knife before adding the next layer. The swirls will still look gorgeous, and the cake will hold together beautifully.
Nutrition facts
Frequently asked questions
Can I make this cake without 7-Up?
If you don't have 7-Up, substitute 2 tablespoons lemon juice + 1 tablespoon orange juice for the syrup. For the frosting, use 1 tablespoon lemon extract instead of the reduced syrup. The citrus notes will still shine through, though the flavor won't be identical to the classic soda version.
How do I get the perfect swirls in the frosting?
Use a long spatula to spread the frosting between layers, then gently drag it through the filling in a circular motion. For extra flair, pipe the cocoa paste swirls on top with a star tip before chilling. The key is to work quickly—once the cake is assembled, the frosting starts to set.
Can I bake this cake in a different pan size?
Yes, but adjust the baking time. For 9-inch pans, reduce batter by 25% and bake 20-25 minutes. For 6-inch pans, increase batter by 50% and bake 30-35 minutes. Always use toothpick test to check doneness. The cake should be golden around the edges but still slightly springy in the center.
Why does my cake taste bitter?
Bitter flavor usually comes from overbaking or old ingredients. Check your baking powder—it should be fresh (test with vinegar). Also, ensure your citrus zest is fresh, not dried out. If the cake baked too long, the sugar caramelizes, creating bitterness. For next time, pull the cake when the toothpick comes out with a few moist crumbs, not completely clean.
How long does this cake keep?
Store covered at room temperature for 2 days or refrigerate for 5 days. For longer storage, freeze the fully assembled cake (without frosting) for up to 2 months. Thaw overnight in the fridge before serving. The frosting may weep if refrigerated, so bring to room temp before slicing for best texture.