
Desserts
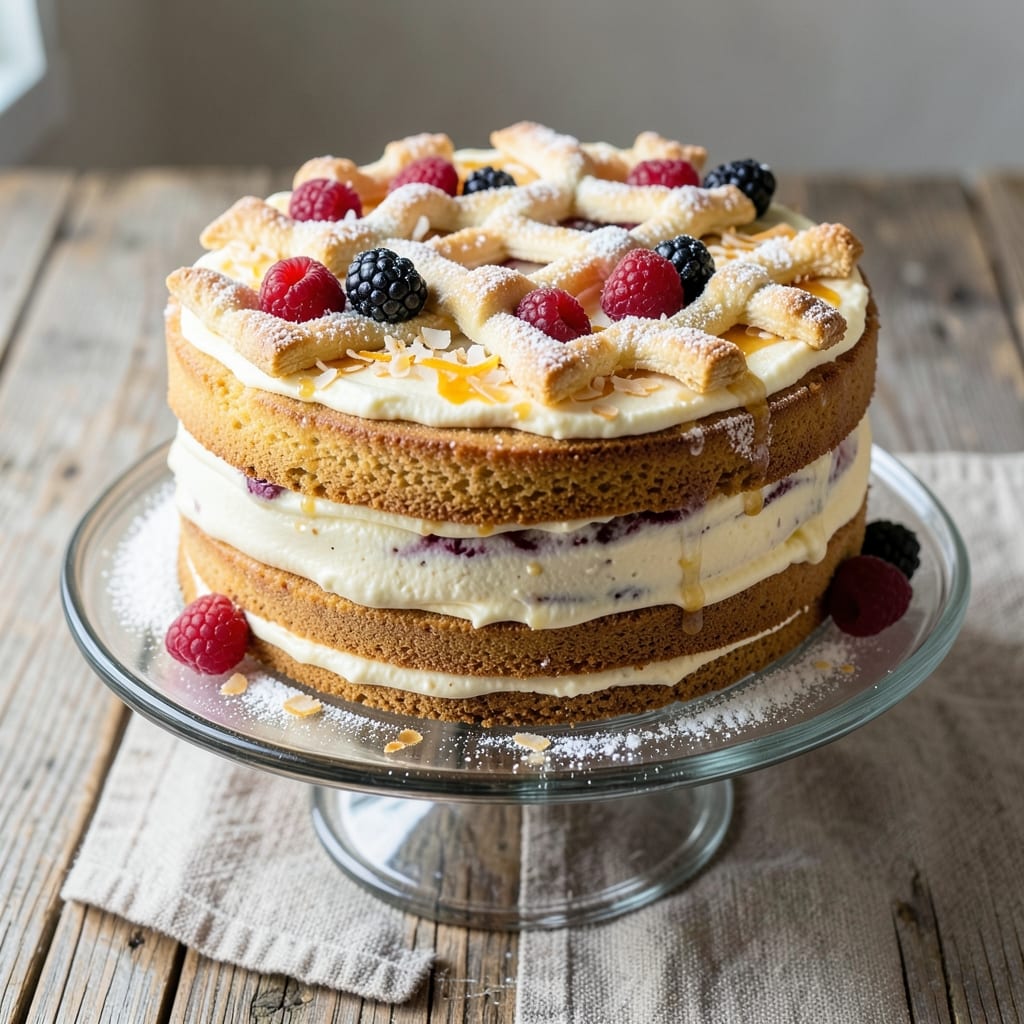
This allergy-friendly cake recipe proves you don’t need eggs or dairy to create a moist, tender crumb that rivals traditional cakes. 💛 After years of perfecting substitutions, I’ve developed a fail-safe method using simple pantry staples that deliver restaurant-quality results without compromising texture or flavor. The secret lies in the right combination of egg replacers and dairy-free butter that mimics the richness of classic cakes.
What makes this recipe truly special is its adaptability—it’s egg-free, dairy-free, and nut-free by design, yet maintains the familiar structure of a traditional cake. The key ingredients include a blend of gluten-free flour for structure, applesauce as an egg substitute for moisture, and coconut oil-based butter that stays stable under high heat. These substitutions work together to create a cake that’s light, fluffy, and perfectly tender.
By the time you pull this cake from the oven, you’ll have a golden-domed dessert with a fine, even crumb that’s moist without being dense. It slices cleanly, holds its shape, and tastes like a cake you’d find at a bakery—not an allergy-friendly compromise. The best part? It’s simple enough for beginners but impressive enough for guests, proving that delicious desserts are possible for everyone.
Whether you’re baking for dietary restrictions or simply exploring new techniques, this recipe delivers on both flavor and texture. The instructions are clear, the substitutions are foolproof, and the results are consistently amazing. Let’s get started on a cake that’s as inclusive as it is delicious.
Ingredients for allergy friendly cake
Simple pantry staples transform into a bakery-style cake without eggs or dairy.
| Ingredient | Amount | Notes |
|---|---|---|
| All-Purpose Gluten-Free Flour Blend 🌾 | 2 cups | Bob's Red Mill 1:1 preferred |
| Unsweetened Applesauce 🍎 | ¾ cup | Unsweetened, no sugar added |
| Coconut Oil-Based Vegan Butter 🧈 | 1 cup | Miyoko's or Earth Balance brand |
| Granulated Sugar 🍚 | 1 ½ cups | White or light brown sugar |
| Light Brown Sugar 🍚 | ½ cup | Packed lightly |
| Vanilla Extract 🌸 | 2 tsp | Pure, high-quality vanilla |
| Baking Powder 🧂 | 2 tsp | Aluminum-free preferred |
| Baking Soda 🧂 | ½ tsp | Freshly opened |
| Salt 🧂 | ½ tsp | Fine sea salt |
| Unflavored Almond Milk 🥛 | ½ cup | Silken tofu works too |
| Lemon Zest 🍋 | 1 tbsp | Freshly grated |
| Xanthan Gum 🧪 | ¼ tsp | Essential for structure |
The gluten-free flour blend is non-negotiable here—Bob's Red Mill 1:1 or King Arthur Measure for Measure work best, as they mimic all-purpose flour's structure. I always grab a 2-pound bag from Whole Foods or King Arthur's website for freshness, since gluten-free flour loses potency faster than regular flour. For the applesauce, Mott's unsweetened from the canned section is reliable, but homemade works even better—just blend peeled apples until smooth. The coconut oil-based butter is where the magic happens: Miyoko's or Earth Balance stay stable at high heat, unlike regular vegan butter that can seize up.
No applesauce? Mashed banana or pumpkin puree works in a pinch, though the flavor shifts slightly. Running short on almond milk? Silken tofu blended with water mimics the creaminess perfectly. The xanthan gum might be tricky to find—check the baking aisle at Target or Walmart, or order it online if your local store doesn't carry it. For the sugars, I prefer light brown in the second cup for subtle molasses notes, but white sugar keeps things neutral. Fresh lemon zest is ideal, but bottled zest from Trader Joe's saves time without sacrificing flavor.
Store the dry ingredients (flour, baking powder, xanthan gum) in airtight containers in a cool, dark place for up to 6 months. The wet ingredients (applesauce, coconut butter, almond milk) keep in the fridge for 1 week once opened. For best results, mix the batter and bake immediately—the gluten-free flour starts absorbing moisture right away. Leftover batter? Portion into mini muffin tins for bite-sized treats that freeze beautifully for 3 months
Why You'll Love This Recipe
- Same batter, endless uses: layer it for a celebration cake or slice it into muffins for breakfast. I’ve even frosted it with dairy-free cream cheese and no one guessed it wasn’t "normal" cake.
- No-Fuss Mixing: I swear by the applesauce trick—it keeps the batter light without extra eggs or weird textures. Just stir, pour, bake. Honestly, my kitchen looks cleaner than when I make regular cake.
- Moist Without Guilt: That combo of coconut butter and brown sugar? Rich but not heavy, and it stays soft for days. My gluten-free friends actually ask for seconds—no sad crumbs here.
- Birthday to Brunch: Same batter, endless uses: layer it for a celebration cake or slice it into muffins for breakfast. I’ve even frosted it with dairy-free cream cheese and no one guessed it wasn’t "normal" cake.
Step-by-step instructions for allergy-friendly cake
This method delivers a perfectly moist, allergy-friendly cake without eggs or dairy.
👨🍳 Step 1: Cream the Vegan Butter and Sugars
In a stand mixer fitted with the paddle attachment, combine the 1 cup coconut oil-based vegan butter with the 1.5 cups granulated sugar and 0.5 cup light brown sugar. Beat on medium speed for 3-4 minutes until light and fluffy—you'll see the mixture nearly double in volume and become pale. This step incorporates air, which creates that signature tender crumb.
Here's the thing—don't rush this part. You want the sugars to dissolve completely and the butter to emulsify properly. I press down on the mixture with a spatula occasionally to check for smoothness. If it still looks grainy after 4 minutes, give it another minute. The goal is that ribbon test: when you lift the beaters, the mixture should form a ribbon that holds its shape for a few seconds.
👨🍳 Step 2: Add Wet Ingredients and Mix Thoroughly
In a separate bowl, whisk together the 0.75 cup unsweetened applesauce, 0.5 cup unflavored almond milk, 2 tsp vanilla extract, 1 tbsp lemon zest, and 0.25 tsp xanthan gum. The xanthan gum is crucial here—it mimics the binding properties of eggs and gluten in traditional cakes. Add this wet mixture to the butter-sugar blend and mix on low speed for 1 minute to combine completely.
Next, in the same bowl, sift together the 2 cups gluten-free flour blend, 2 tsp baking powder, 0.5 tsp baking soda, and 0.5 tsp salt. With the mixer still running on low speed, gradually add the dry ingredients to the wet mixture. Mix just until combined—you should still see some flour streaks. Overmixing develops gluten in the flour, which can make the cake dense. Stop mixing as soon as the batter comes together smoothly.
🥘 Step 3: Prepare the Pans and Bake
Preheat your oven to 350°F. Generously grease two 8-inch round cake pans with coconut oil or line them with parchment paper circles. Divide the batter evenly between the pans, smoothing the tops with a spatula. Tap each pan gently on the counter a few times to remove any air bubbles that might have formed during mixing.
Bake for 25-30 minutes, or until a toothpick inserted into the center comes out clean. I check the cake at the 22-minute mark—this recipe tends to bake quickly in gluten-free flours. The edges should pull away slightly from the pan, and the top should spring back when gently pressed in the center. If the top browns too quickly, tent the pans with aluminum foil after 15 minutes of baking.
⏰ Step 4: Cool and Check for Moisture
Remove the cakes from the oven and let them cool in the pans for 10 minutes. Then transfer them to a wire rack to cool completely. This cooling process is critical for gluten-free cakes—they need time to set properly without becoming gummy. While they cool, I like to make a simple glaze by mixing ½ cup powdered sugar with 1-2 tablespoons almond milk until smooth. Brush this over the cooled cakes for extra moisture and shine.
Here's where the magic happens: if your cake feels slightly dense when first cooled, don't worry. Gluten-free cakes often need time to set. Once fully cooled, the texture should be perfectly moist with a tender crumb. The lemon zest adds a bright citrus note that balances the sweetness, while the applesauce keeps the cake incredibly moist without being heavy. For best results, serve within 2-3 days—this cake doesn't freeze well but tastes best fresh.
Pro Tips For Making Allergy Friendly Cake
- MIX DRY INGREDIENTS FIRST: Gluten-free flour blends are finicky—sift or whisk them with sugar and salt before adding wet ingredients. This prevents clumping and guarantees even distribution, which makes all the difference when baking without gluten’s natural structure to hold things together.
- CHILL THE BATTER: After mixing, pop the batter in the fridge for 10–15 minutes. Cold butter and applesauce behave better, and the cake rises more evenly without sinking in the middle. (Yes, even if you’re impatient like me—I learned this after one particularly sad, flat attempt.)
- USE ROOM-TEMP COCONUT BUTTER: Solid coconut oil-based butter will leave pockets of grease in your cake. Microwave it for 10–15 seconds to soften, then let it sit until it’s spreadable but not melted. This keeps the texture tender without making it greasy—trust me, your future self will notice.
- DON’T OVERMIX THE APLESAUCE: Stir the applesauce into the wet ingredients just until combined—no need to whip it into oblivion. Overmixing introduces too much air, which can cause gluten-free cakes to collapse or develop a dense, gummy texture. Think "fold gently," not "beat aggressively."
Pro cooking tips for this recipe
Mixing Precision Matters
Gluten-free baking demands gentle handling—overmixing develops gluten in the flour, making your cake dense instead of tender. Use a stand mixer on low speed when combining wet and dry ingredients, and stop as soon as the batter comes together smoothly. I always check for flour streaks; if they disappear too quickly, you’ve mixed too much. For extra insurance, use a spatula to fold in the last 20% of flour by hand. 💡
Butter Temperature Control
The coconut oil-based vegan butter (Miyoko’s or Earth Balance) must be at room temperature before creaming—around 68°F. If it’s too cold, the sugars won’t dissolve properly, and your cake will turn out greasy. To test, press a finger into the butter; it should leave a slight indentation without feeling sticky. If your kitchen is cold, let the butter sit on the counter for 30-45 minutes before starting. Never microwave it—heat fluctuates unevenly.
Xanthan Gum is Non-Negotiable
This 0.25 tsp of xanthan gum is the secret weapon for structure in gluten-free baking. Without it, your cake will crumble or fall apart. Whisk it thoroughly into the wet ingredients first to prevent clumping. If you’re out, psyllium husk powder (½ tsp) works in a pinch, but the texture will differ slightly. Pro tip: Store xanthan gum in a small airtight container near your baking supplies—it’s easy to forget until you’re halfway through the recipe! ✨
Baking Time Variations
Gluten-free cakes bake faster than traditional ones, so start checking for doneness at 22 minutes with a toothpick. If the edges pull away from the pan but the center’s still wet, tent with foil and bake 2-3 more minutes. Overbaking dries out gluten-free cakes quickly. For even baking, rotate the pans halfway through the cook time. I use 8-inch round pans for consistent results—avoid dark pans, which can over-brown the cake.
Cooling is Critical
Let the cakes cool in their pans for 10 minutes before transferring to a wire rack. This prevents them from cracking as they set. If you’re impatient, resist the urge to rush this step—gluten-free cakes need time to firm up. For extra moisture, brush the cooled cakes with a powdered sugar glaze (½ cup powdered sugar + 1 tbsp almond milk). This step is optional but makes a noticeable difference in texture and presentation.
Nutrition facts
Frequently asked questions
Can I make this allergy-friendly cake without gluten-free flour?
This recipe is specifically designed with gluten-free flour to ensure it's safe for those with celiac disease or gluten sensitivities. However, if you're not avoiding gluten but want to keep it dairy-free and egg-free, you can substitute the gluten-free blend with all-purpose flour (2 cups) and omit the xanthan gum. The texture will be slightly different but still delicious!
What if I don't have applesauce? Can I use something else?
For the 0.75 cup applesauce, you can use mashed banana (adds sweetness) or pumpkin puree (neutral flavor) in equal amounts. For a neutral option, unsweetened Greek yogurt (dairy-free version) works well too. Just remember that substitutions may slightly alter the flavor profile.
How do I prevent my cake from cracking while baking?
Cracking is common in gluten-free baking, but you can minimize it by ensuring your oven is fully preheated to 350°F and the batter is room temperature. Tap the pans gently on the counter after filling to release air bubbles, and avoid opening the oven door during the first 20 minutes of baking. If cracks appear, they're usually superficial and won't affect the taste!
Can I add mix-ins like chocolate chips or nuts?
This recipe is nut-free by design, but you can add dairy-free chocolate chips or sunflower seeds (for nut-free options). Fold them in gently during the final mixing stage—don't overmix! For chocolate chips, use ½ cup max to avoid sinking. If adding nuts, ensure they're certified nut-free for safety.
Why does my cake taste slightly bitter?
Bitterness often comes from overbaking or using old baking powder. Check your baking powder's expiration date—it should be fresh (test by mixing with water; it should bubble vigorously). Also, avoid overbaking: gluten-free cakes dry out quickly. For best results, pull the cake when a toothpick comes out with a few moist crumbs, not wet batter.